
In this post – how to plant succulents in a glass container using layers of pebbles, gravel, soil and sand.
It’s almost summer and I am busy prepping our Bay Area patio for the season. One of the things I like to add to our outdoor seating area is succulents. They are hardy and can tolerate being left to fend for themselves when we are in San Diego. In this post, I will show you how I repurposed (again!) a rectangular glass container into an attractive layered display.

About Container Succulents
Succulents have become a beloved staple in home decor — and for good reason. These hardy little plants are not only easy to care for but also come in an incredible variety of shapes, colors, and textures. Their low-maintenance nature makes them ideal for busy plant lovers, beginners, or anyone looking to add a bit of green to their space without the upkeep of more finicky plants, like myself.
One of the most creative and visually striking ways to showcase succulents is by planting them in a clear glass container. Unlike traditional pots, a glass vessel lets you display each layer of the planting process — from smooth river rocks and crisp white sand to rich soil and the bold, sculptural forms of the succulents themselves. It turns a simple plant arrangement into a work of living art.

This layered succulent display is the perfect blend of form and function. Not only does the layering support the plant’s health by promoting proper drainage and airflow, but it also adds beautiful natural texture and dimension to your decor. Whether you’re looking to create a centerpiece, a desk accent, or a handmade gift, this project is both pretty and plant-friendly.

Step 1: What You’ll Need
Whenever I need multiple small succulents, I like to head to Trader Joe’s. They usually have small succulent arrangements for about ten dollars, which is cheaper than buying the plants individually. The one I bought was in a really pretty pale blue hobnail ceramic bowl that I cleaned to reuse somewhere else in my home. It contained a variety of six small succulents, which made them less than two dollars apiece.

To begin this project you’ll need the following:


This article includes affiliate links; if you click on a shopping link and make a purchase I may receive a commission. As an Amazon Associate, I earn from qualifying purchases at no additional cost to you.
- Glass container (open or partially enclosed)
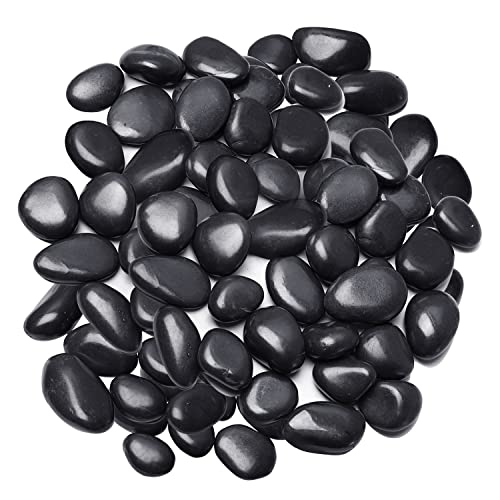
- Small rocks or pebbles (for drainage)
- Sand (decorative and functional)
- Cactus/succulent soil
- Succulent plants
- Long spoon or chopstick (for layering/control)
- Decorative moss or top layer white pebbles or sand (optional)
Supplies for a Glass Succulent Container Garden
 Buy Now →
  Buy Now →
 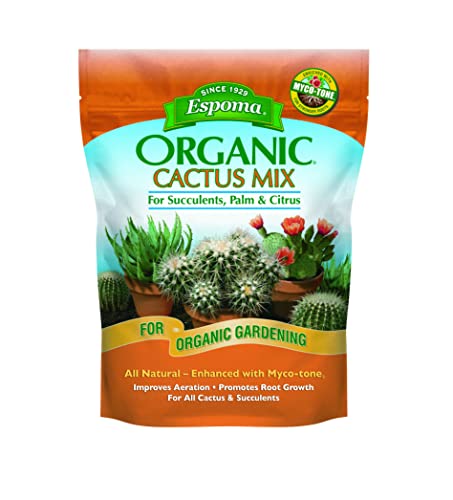 Buy Now →
  Buy Now →
  Buy Now →
  Buy Now →
  Buy Now →
 Step 2: Choosing the Right Glass Container
One of the most fun parts of creating a succulent terrarium is selecting the glass container. Because succulents thrive in well-draining soil and don’t require high humidity, open containers are ideal. You want airflow and visibility — not a sealed environment like you’d use for tropical plants. For this project, I repurposed a long rectangular glass container. You can see it in its previous iterations below! For more information on how I created these holiday centerpieces, check out these posts: How to Style a “Sweet” Centerpiece for Valentine’s Day and How to Upcycle an Old Wreath Into a Pretty Centerpiece.

 Buy Now →
 Great options for glass containters include:
- Open glass bowls – These are perfect for wide, shallow arrangements and allow for easy access when planting or rearranging.
- Clear vases – Tall, cylindrical vases create a dramatic vertical presentation and are great for layering sand and rocks in bold stripes.
- Apothecary jars or wide-mouth jars – These add a vintage or coastal touch and work well for small groupings of succulents.
When choosing a container, consider both size and shape based on how many succulents you plan to use. A wider container allows for more variety and room for growth, while a taller or narrower one offers a striking, layered profile but may only hold one or two small plants comfortably. For example, mason jars make terrific and inexpensive succulent containers.

If you’re using a single statement succulent, a small round vase or a globe-shaped container can beautifully spotlight the plant and its surrounding textures.

You might be wondering: don’t succulents need drainage holes? In traditional pots, yes — but when using a glass container without holes, it’s all about how you layer. Proper layering is essential to mimic drainage and prevent root rot. By starting with a generous base of pebbles, you’re creating a foundation that allows excess moisture to settle away from the roots. This way, even without a drainage hole, your succulent has the dry, airy conditions it loves — and you get to enjoy the added benefit of a beautifully visible layering effect.
Section 3: Layering for Beauty + Plant Health
The order of the layers for your container is as follows:
- Pebble base – drainage to avoid root rot
- White gravel layer – visual interest + moisture control
- Cactus soil – the main growing medium
- Decorative top layer of white sand – optional but adds a finished look
To start, I filled the bottom of the container with about an inch of small smooth gray pebbles. Next, I added a half-inch layer of white gravel and smoothed it out. Tip: if you want your layers to look more defined, use smaller pebbles – just be sure they are large enough to allow small air pockets between them.


Step 4: Planting Your Succulents
The next step was to break apart the succulent arrangement. This was easy as the plants naturally came apart when I removed them from the bowl. I tried not to disturb their roots. I arranged them in the container in a single-file line. Once I was happy with their placements, I gently filled in the areas around them with the cactus mix potting soil. Tip: you can use a teaspoon or chopsticks to gently push the soil between and around the plants.


Step 5: Add the Decorative Top Layer
For a finished look, I added a layer of white sand on top of the potting mix. This makes the plants really pop and gives the container a clean and finished look.

Step 6: Care Tips for Your Succulent Glass Garden
Once your layered succulent arrangement is complete, a little thoughtful care will keep it thriving and beautiful for months (even years) to come. Fortunately, succulents are among the most forgiving plants — perfect for beginners or anyone who wants a stylish, low-maintenance indoor garden.
Watering Advice: Less Is More
Succulents are drought-tolerant plants that store water in their thick leaves, so they don’t need frequent watering — especially in a glass container without drainage holes. As a general rule, water only when the soil is completely dry, about every 2–4 weeks depending on the climate and season.
To water:
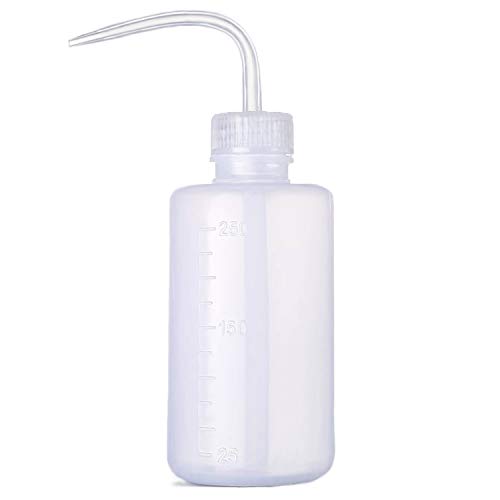
- Use a squeeze bottle, dropper, or long-spout watering can to target the soil, not the leaves.
- Add water slowly to avoid over-saturating the layers.
- Tip: If you notice moisture lingering in the soil or see signs of rot (mushy leaves or black stems), you’re likely overwatering. Err on the dry side — succulents prefer it that way.
 Buy Now →
 Light Needs: Bright, Indirect Light
Succulents love sunshine but too much direct light through glass can scorch their leaves or cause the container to overheat. Place your glass garden in a spot where it gets bright, indirect light — such as a windowsill with filtered light or near a sunny corner.
If natural light is limited, you can supplement with a grow light. Look for signs of stretching (etiolation), where succulents grow leggy and pale — this means they’re not getting enough light and should be moved closer to a light source.
 Buy Now →
 Rotate for Even Growth
Succulents naturally lean toward the light, so rotating your container every week or two will help them grow straight and evenly. This is especially helpful in decorative containers where symmetry and balance are part of the visual appeal.
When to Prune or Replace Plants
Over time, some succulents may outgrow the container or drop lower leaves. Pruning helps keep your arrangement tidy and encourages new growth:
- Snip off leggy stems just above a leaf node, and you can even replant the cuttings.
- Gently remove dried or dead leaves at the base.
- If a plant starts to rot or wither, replace it with a new succulent to maintain the look of the arrangement.
 Buy Now →
 Glass succulent gardens are meant to evolve — with minimal upkeep, you can refresh or re-style them as needed to keep them looking their best.
Give this project a try!
I hope you will try this project. It’s so easy and the results are so pretty! I’ll definitely be making more of these succulent containers! What do you think? Let me know in the comments below!
Pin It!

Subscribe below to get my weekly post roundup delivered straight to your inbox!
Featured on…


sharing @between naps on the porch
Discover more from From the Bay to the Beach
Subscribe to get the latest posts sent to your email.


4 Responses
What a lovely arrangement, thanks for sharing with us at Handmade Monday 🙂
Thanks Julie!
Great tips for planting succulents! I am happy to feature you at Thursday Favorite Things this week!
Thanks Amber! Looking forward to stopping by!