In this post – tips for setting a formal Thanksgiving table and my grandma’s stuffing recipe.
We’re hosting Thanksgiving at our Bay Area home for the first time this year. I’m looking forward to having our family together for a meal and spending some time together. Now that our kids are grown, it’s rare that we can get the whole family together, so when we do it’s special.

Because it’s so difficult to carve out time for all of us to be together, the Thanksgiving meal is a special occasion that deserves extra effort. Setting a beautiful table is a way for me to show my family members how much I value spending time with them. Although I’m not actually cooking the meal this year (see this post), I still want to make the meal beautiful and memorable.
The Basics of Setting a Formal Table.
I believe everyone should know the basics of how to set a table. Not only is it an important life skill, it will help you know which fork to use when you dine at a formal event or restaurant. While I am certainly not an etiquette expert, I’m happy to share how I set a formal table. Ready to learn the basics?

Step 1: Tablecloth or No Tablecloth?
This is a matter of preference. Most of the time, a formal table has a tablecloth. I was initially undecided because we have a new black dining set that I love the look of and I thought I wanted to leave the table bare. But, after finding a pretty tablecloth that could be delivered quickly – thank you Amazon – I decided to go the more traditional route and cover the table.

When considering what size tablecloth to use, keep in mind that you will want one big enough to cover your table and hang over the sides a bit. According to the Crate and Barrel website, “a cloth with a drop of 8-to 9-inches from the side of your table is considered a comfortable drop for casual, easy dining. Plus, it won’t restrict your diners legs or block access to the chairs.” I ordered a tablecloth that will hang approximately 10” down from each side. If your dining chairs have arms, you’ll want to keep the overhang on the shorter side so the chairs can be tucked in.


Step 2: What’s a Charger?
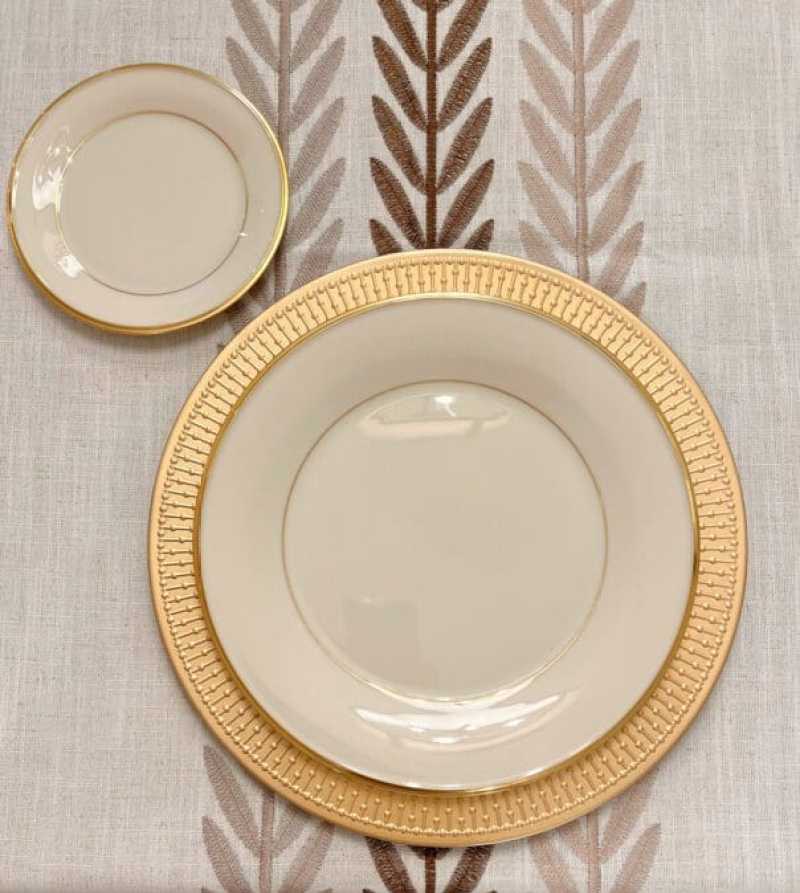
Also known as a service plate, a charger is a large platter measuring somewhere between 11” – 14” in diameter. This plate is the base layer of your table setting. Its purpose is to protect your tablecloth from spills, especially from the soup course. While we don’t usually serve soup at Thanksgiving, I like the look of the chargers under the dinner plates. I use them as a substitute for place mats. You can leave the chargers in place throughout the meal, removing them before dessert.

Step 3: Dinnerware
If you have fine china, now is the time to use it, although nicer everyday dinnerware is fine too. I am using the Lenox china that was my parents’ wedding china. The pattern is called Lenox Eternal Gold and has been around for over 50 years. We have our own wedding china, but I wanted to use something different this year and I like the clean lines of this set. Speaking of fine china – do couples even register for wedding china anymore?

To start, the dinner plate is placed directly on top of the charger with the salad plate on top of it. Since we aren’t having a salad course for our Thanksgiving we won’t be needing salad plates, but I am using the bread plates for dinner rolls. These are placed above the dinner plate on the left side.


Step 4: Cutlery
I have some pretty gold flatware that I like to use when setting a formal table. I like how it complements the gold edges of the china and the gold chargers.

Start by placing the dinner fork to the left of the plate. The salad fork goes next to the dinner fork on the outside, while the dinner fork is closer to the plate. Place the knife (blade facing inward) and soup spoon to the right of the plate. If you want to be really fancy, lay the dessert fork and spoon horizontally above the plate, with the fork handle pointing left and the spoon handle pointing right. (I usually just hand out dessert forks with dessert.)
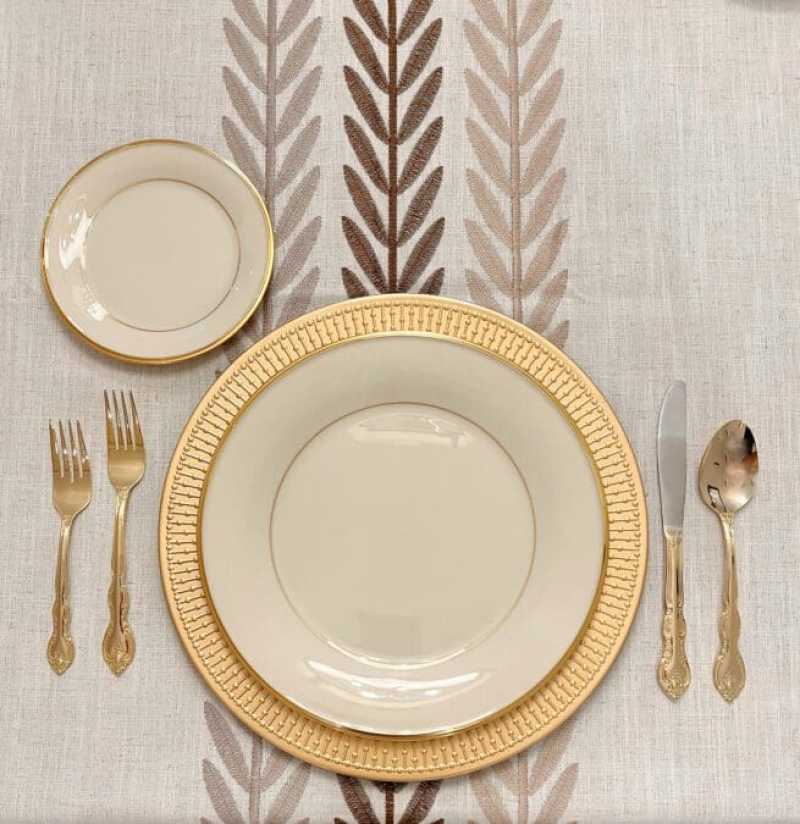
As far as when to use what, the general rule of thumb is to start with the cutlery on the outsides and work your way toward to the center with each course.
Step 5: Glassware
Here in California we are fortunate to have some of the best wineries in the world, so we definitely include wine glasses on our Thanksgiving table. To place the glassware, start with the water glasses. These should be placed directly above the knives. The other glasses should be placed around the water glass. I like to use both a red and a white wine glass. I place the red wine glass to the right of the water glass and the white wine glass above and slightly to the right of it.
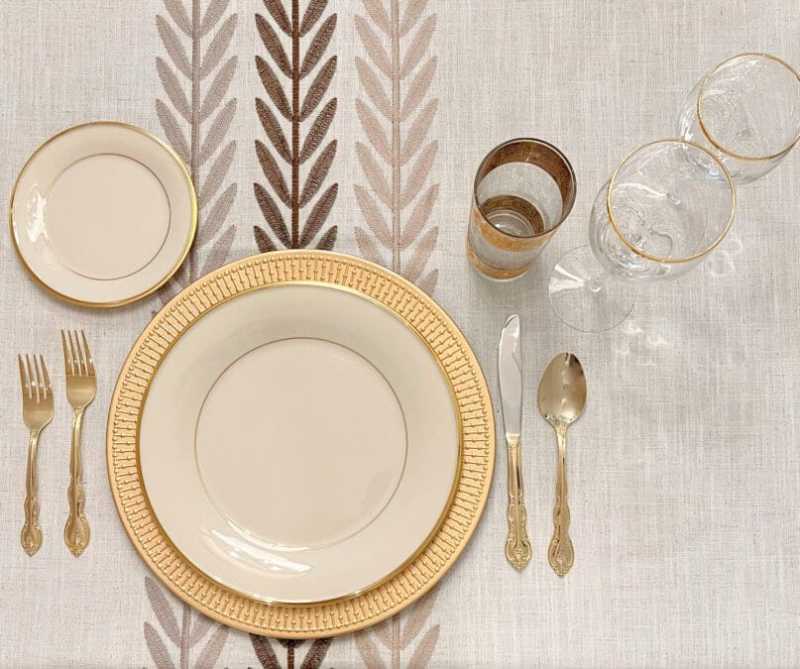
If your table is small you may have to alter this arrangement to suit your needs. You don’t want your guests knocking each other’s wine glasses over with their elbows!
Step 6: Napkins
Cloth napkins are preferable at a formal table. I like to use napkin rings to hold the napkins. I place the napkins on top of the dinner plates with the point of the napkin facing toward my guest. If you prefer to place the napkin off to the side, then you can place it wherever you wish.

If you want to learn more about the ins and outs of formal dining, be sure to check out this website called etiquette scholar. It’s a great resource if you have any questions about proper etiquette in different situations, including weddings, graduations, emails and more.
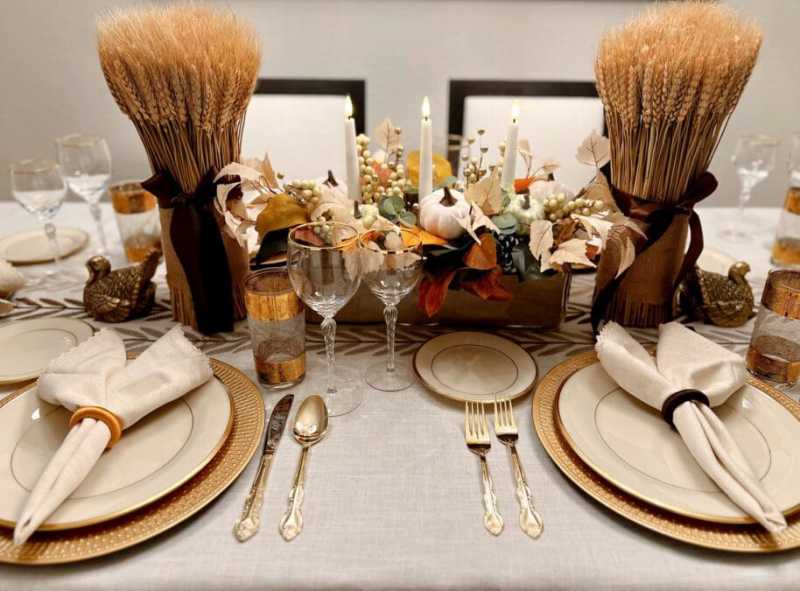
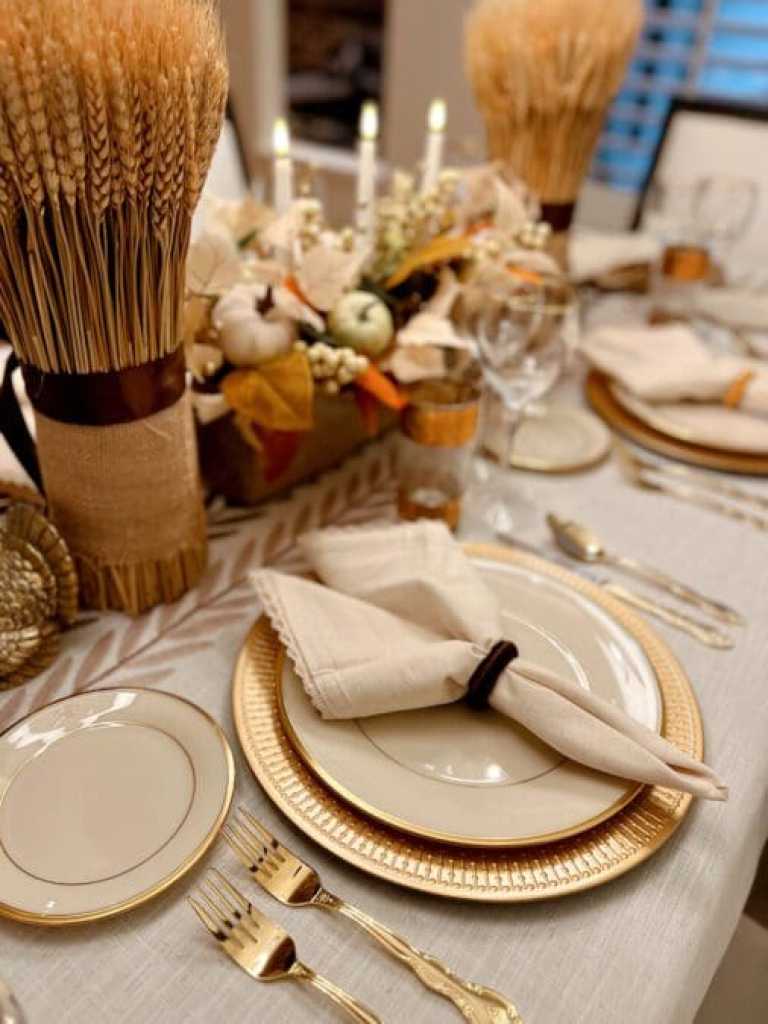
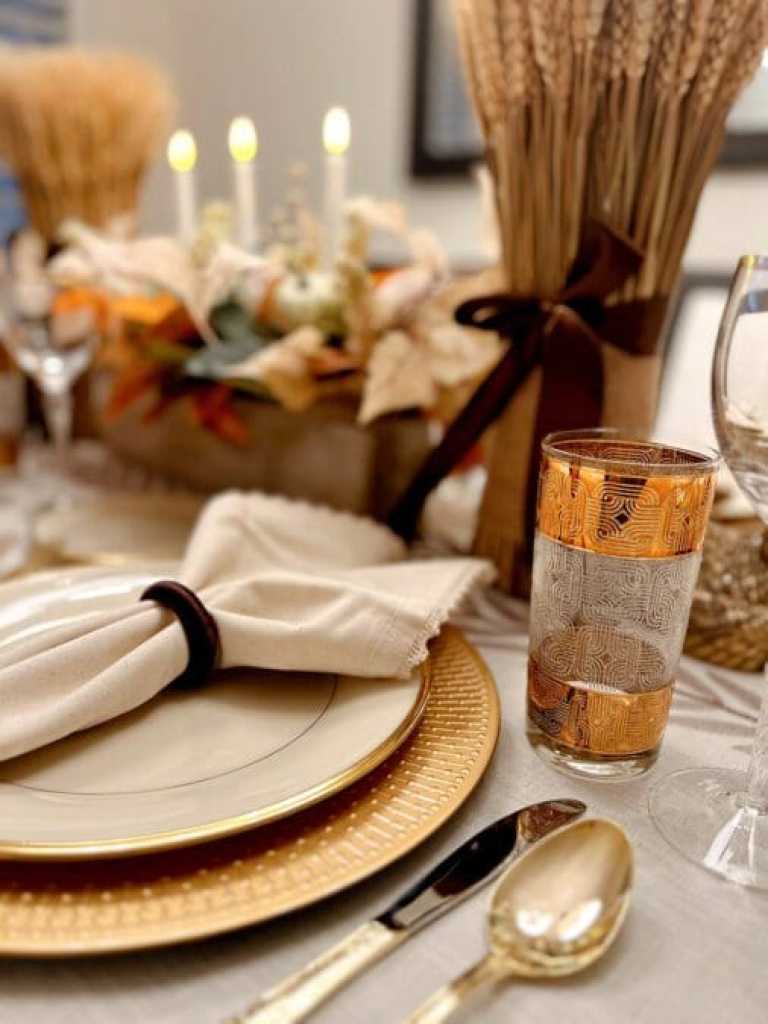
For details on how I made the centerpiece, see How to Upcycle an Old Wreath Into a Pretty Centerpiece.
Pin It!

However you set your Thanksgiving table, I hope you have a lovely dinner with your loved ones! What’s your favorite detail to include in a formal table setting? Let me know in the comments below!
Sources
This article includes affiliate links; if you click on a shopping link and make a purchase I may receive a commission. As an Amazon Associate, I earn from qualifying purchases.
My Grandma Tillie’s Stuffing Recipe
One of the things I love about Thanksgiving is the chance to reflect on people we love who have passed. I have a collection of recipe cards with my grandma Tillie’s handwriting on them. When I hold the cards they bring back fond memories of my grandma. This stuffing is one of her recipes and is something I make for Thanksgiving every year. Of course, this year I’m not making it since I’m taking a year off from cooking, but I wanted to share it with you.

Recipe
I should preface this recipe by saying I don’t actually stuff it in the turkey. I make it in a large rectangular casserole dish and bake it in the oven. It makes a lot so you may need a second baking dish for any extra.
Ingredients:
2 – 12 oz. bags seasoned stuffing (such as Pepperidge Farm)
1 – 32. oz container turkey stock
1 – 16 oz. roll Jimmy Dean sausage (I use regular) browned with liquid reserved
1 cup chopped celery stalks with leaves (approximately 3 stalks)
3 medium onions, finely chopped
Optional: 1 cup ground pecans (if no guests have nut allergies)
1 tsp. poultry seasoning
2 eggs, beaten
Directions:
Preheat oven 350 degrees. Spray a large rectangular baking dish with non-stick spray.
In a large bowl, combine the stuffing mix, browned sausage with liquid, chopped celery, chopped onions, ground pecans (if using), poultry seasoning, and eggs.
After mixing, pour approximately 16 oz turkey stock (about half of the container) over the mixture and stir until all is moistened but not soggy. Reserve the rest of the stock.
Pour mix into greased casserole dish and cover tightly with foil. Bake for approximately 45 minutes.
Remove from oven. If stuffing looks dry, add more turkey stock and carefully stir. Serve warm.
Discover more from From the Bay to the Beach
Subscribe to get the latest posts sent to your email.


