
In this post – how to make a simple rustic jingle bell garland.
Introduction
The holidays are coming and what better way to celebrate the Christmas season than jingle bells? In this post, I’ll show you a quick and easy way to make a rustic jingle bell garland. It will add some sparkle to your tree or mantel.

Supplies Needed:

This article includes affiliate links; if you click on a shopping link and make a purchase I may receive a commission. As an Amazon Associate, I earn from qualifying purchases.
Command Hooks (Optional)
Step 1: Measure & Cut Twine
I first cut a 9 foot length of twine. This matched the length of my 9 foot long faux cedar garland from Amazon.

Step 2: Select Jingle Bells and Ornaments
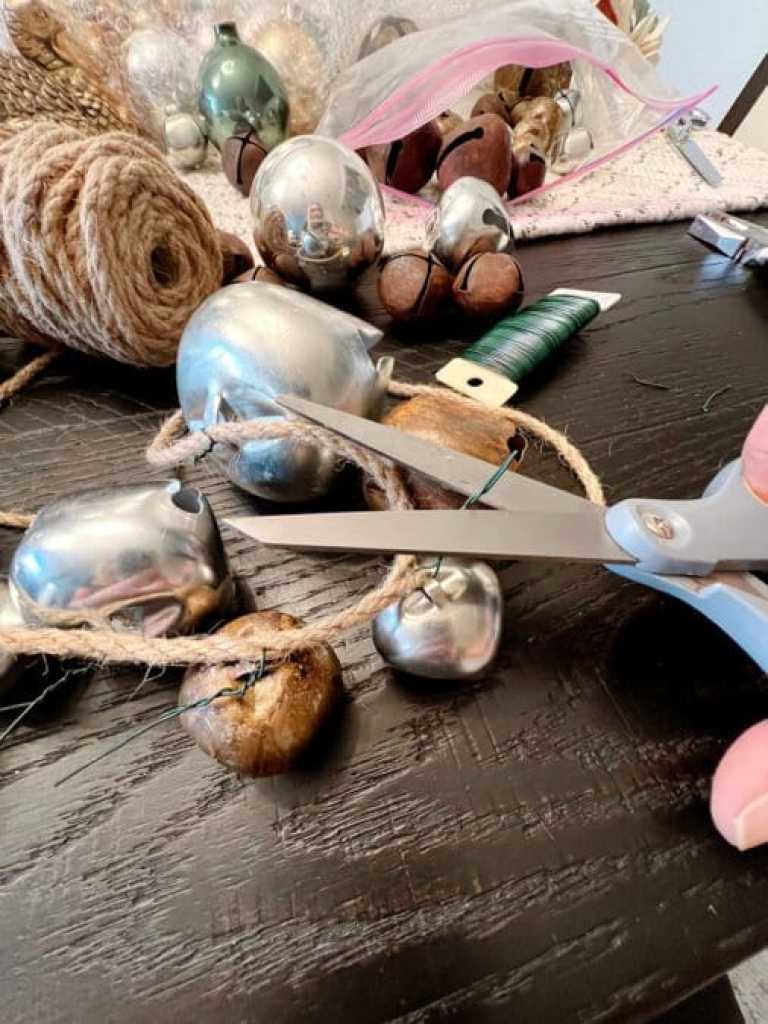
Arrange the jingle bells and ornaments in any pattern that you wish. I decided to do a repeating pattern with the ornaments: green, silver and gold. I spaced those colors out evenly along the twine. Then, I filled in the gaps with a random assortment of jingle bells.

Step 3: Cut Floral Wire
Use heavy duty craft scissors to cut the floral wire into approximately 2.5” lengths. Cut as many wires as you have bells and ornaments.

Step 4: Attach the Jingle Bells and Ornaments to the Twine
To attach the bells to the twine, slide the wire through the loop on the back of a bell. Then poke one end of the wire between the twists in the twine. This will prevent it from sliding on the twine. Grasp both wires firmly and twist together 5 or 6 times, making sure to twist close to the twine. Leave the extra wire for now.
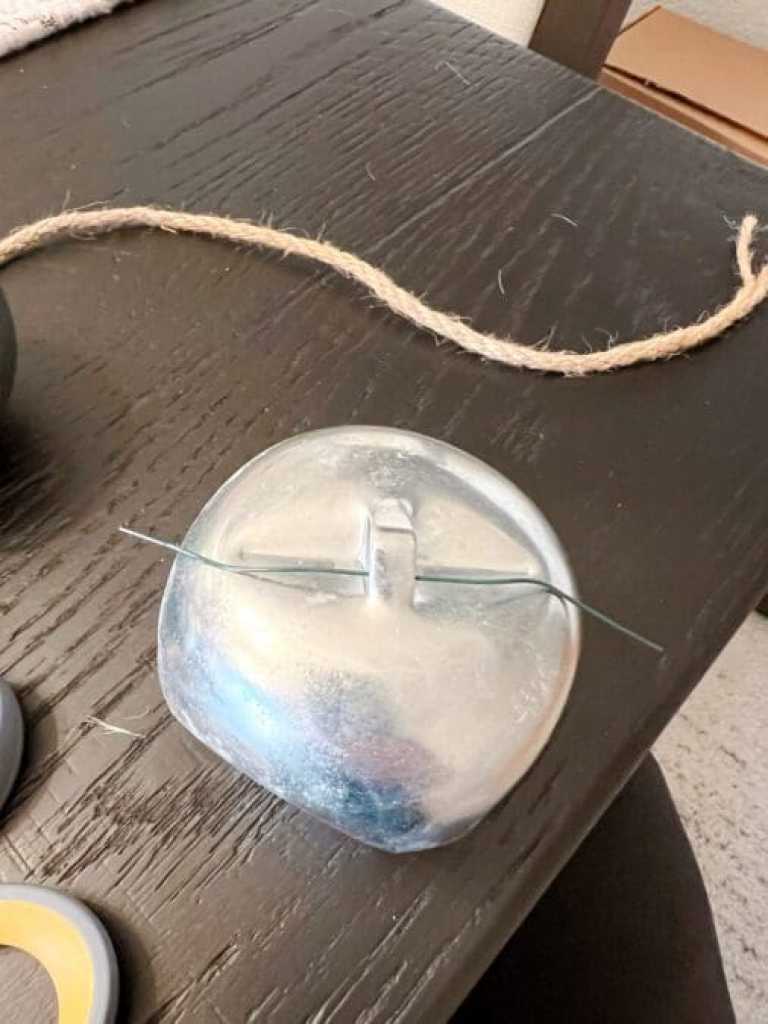

Do the same for each ornament, being careful not to pull the top of the ornament off.

I liked to hold up my garland regularly. This helped me see where I should add more bells between ornaments.

Step 5: Trim Excess Wires
When finished, use scissors or wire cutters to trim off the excess wire from each bell or ornament.

Ways to Use Your Garland
This garland would be pretty on a Christmas tree. Just be sure the branches are sturdy because of the weight. I made my garland to display on our mantel. I layered it on top of a pretty faux garland from Amazon. Want to learn more about our mantel decor this year? Take a look at my post 6 Steps To a Beautiful Holiday Mantel.


Follow Me on Pinterest!

Featured on~
Follow the Yellow Brick Home Blog
Getting Ready for the Holidays: Thursday Favorite Things November 2024


Share this
Leave a Reply
Logged in as Susan. Edit your profile. Log out? Required fields are marked *
Comment *
Discover more from From the Bay to the Beach
Subscribe to get the latest posts sent to your email.


2 Responses
Love the mix of vintage and new bells and baubles on this garland, Susan!
I’d love for you to join us over at the Creatively Crafty Linky Party every Wednesday through Sunday
https://creativelybeth.com/creative-crafts-linky-party-2/
Followed and Pinned!
Creatively, Beth
Hi Beth! Thank you! Looking forward to joining you.