In this post – step-by-step instructions for making a pretty felt poinsettia garland, plus some interesting facts about poinsettia plants.
I was doing some online shopping recently (who isn’t?) and I came across some adorable holiday felt garlands. I was immediately inspired to try making one of my own. Felt is easy to work with, and best of all, you can make amazing things with it without any sewing. Ready to see what I came up with?

Pin It!
Save this pin so you can refer back to it later!

- Pin It!
- How to Make a Pretty Felt Poinsettia Garland
- Materials Needed:
- Step 1: Make a stencil
- Step 2: Trace stencil on felt and cut out leaves
- Step 3: Make the bracts (aka flowers)
- Step 4: Add the green leaves and actual flowers (holly berries)
- Step 5: Make the “holly” filler
- Step 6: Attach to twine
- Step 7: Enjoy!
- Pin It!
- Interesting Facts About Poinsettias
- Featured on~ Eclectic Red Barn (TFT Dec 2024)
- Related Posts
How to Make a Pretty Felt Poinsettia Garland

OK, full disclosure, I jumped into this project with only a vague idea of how I was going to make a poinsettia garland. I’m a “figure it out as you go” person and I’ve found I often work best this way. In fact, some of my best projects have been a result of me making it up as I went along. Also, it turns out I’m posting this on National Poinsettia Day! Who knew? Anyway let’s get to it. Here’s how I made this cute garland.
Materials Needed:
This was a relatively inexpensive project that requires just a few materials. The amounts listed below are enough for a 6’ garland.

This article includes affiliate links; if you click on a shopping link and make a purchase I may receive a commission. As an Amazon Associate, I earn from qualifying purchases.
6 sheets of red felt (12” x 18”)
6 sheets of green felt (12” x 18”)
Hot glue gun (Fabric glue is also pictured, but I found the hot glue worked best.)
Live poinsettia leaf (or print one out online)
Fabric scissors (If you use regular craft scissors they need to be sharp to cut the felt cleanly.)
Step 1: Make a stencil
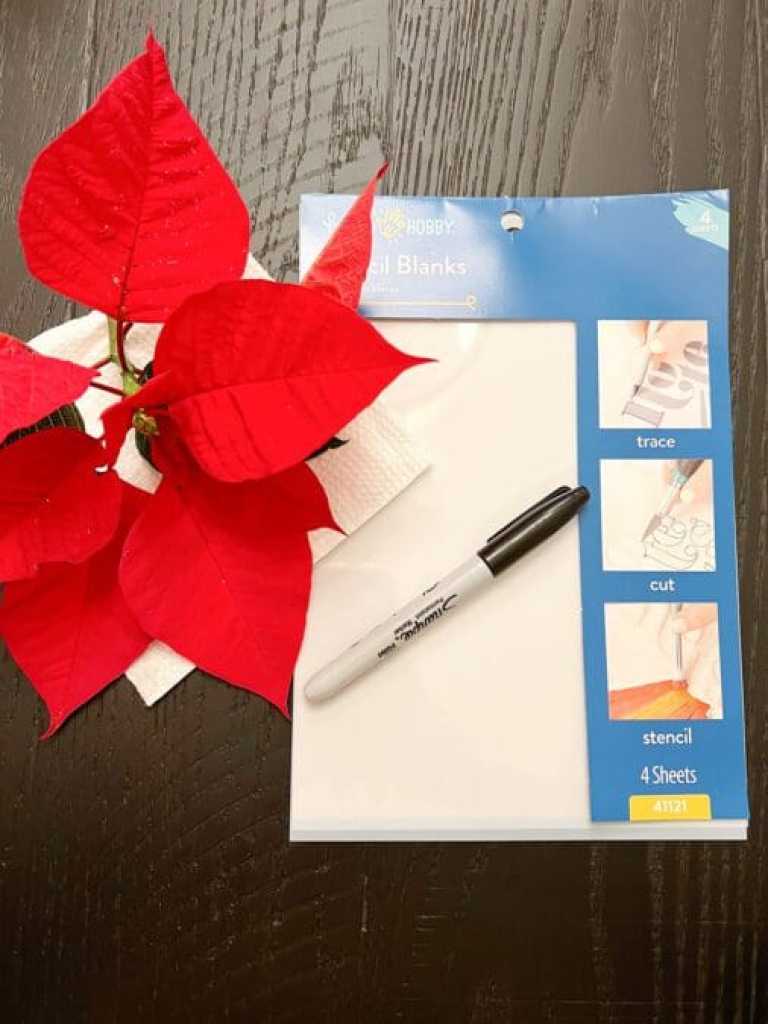
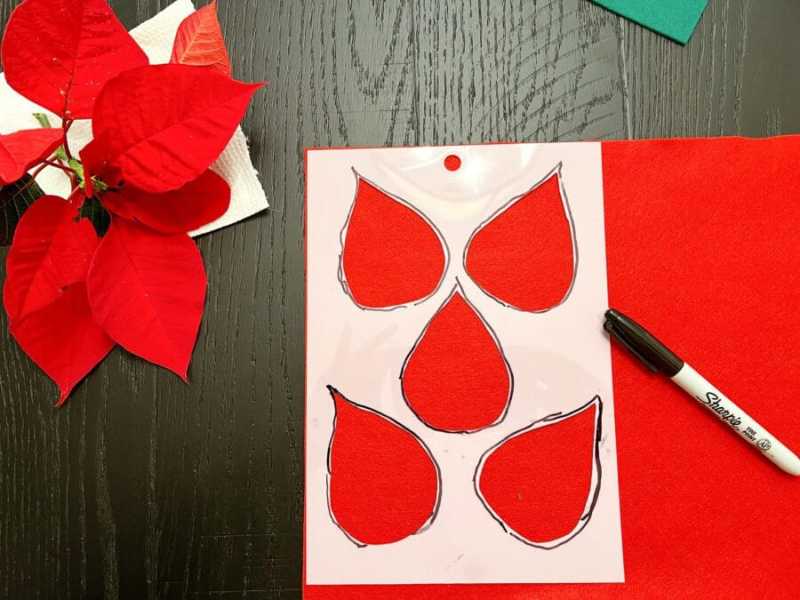
I decided to use an actual poinsettia leaf to make my stencil. If you don’t have access to a live poinsettia plant, there are tons of free leaf printables online. Using a Sharpie, I traced my leaf five times on a stencil sheet. I then carefully cut out all five leaf shapes.


Step 2: Trace stencil on felt and cut out leaves
Once you’ve created your stencil, use your Sharpie to trace leaf shapes on your felt. I used 10 red and 10 green leaf cutouts per flower (the extra green leaves were made into holly “filler”.) I repeated this entire process 6 times for a total of 120 leaves. Set aside your larger scraps for later.


Step 3: Make the bracts (aka flowers)
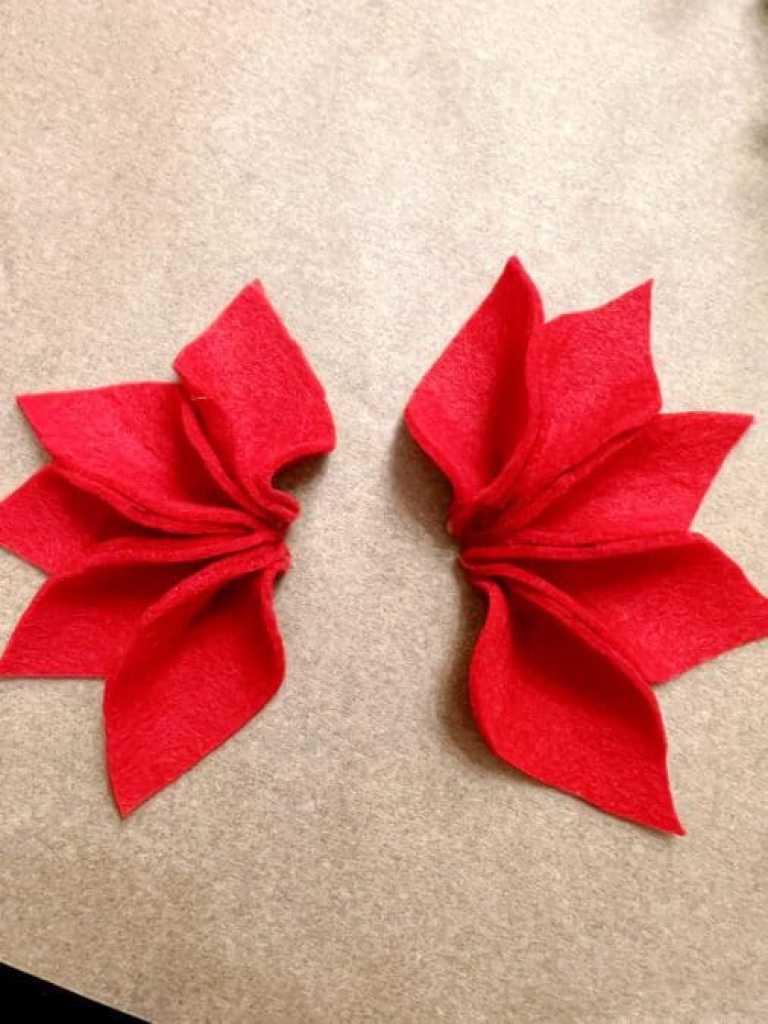
Through trial and error I found the best way to put the flowers together is one half at a time. To start, I placed a drop of glue on the round end of each leaf and pinched it together until it held. I did this for all of the leaves, both red and green.


Next, I put a drop of glue on the outside of each red leaf and pinched it to another red leaf. I did this 5 times to make each half of the flower. I then glued the two flower halves together.


Step 4: Add the green leaves and actual flowers (holly berries)
Once the flower was assembled I flipped it over and glued on about 5 green leaves with the leaves facing forward. I then cut out a circle of green from my felt scraps to cover the back of the flower. Turn the flower over and add the actual flowers, represented by the faux holly berries stripped from their stems.


Step 5: Make the “holly” filler
Because I had extra green leaves I decided to make sprigs of holly to fill in between the flowers on the the garland. I was winging this remember? I’m glad I took this step because they fill in the garland beautifully!
Take two or three green leaves and glue them together using the same process as the red ones. Then glue 1, 2 or 3 berries where the leaves meet.


Step 6: Attach to twine
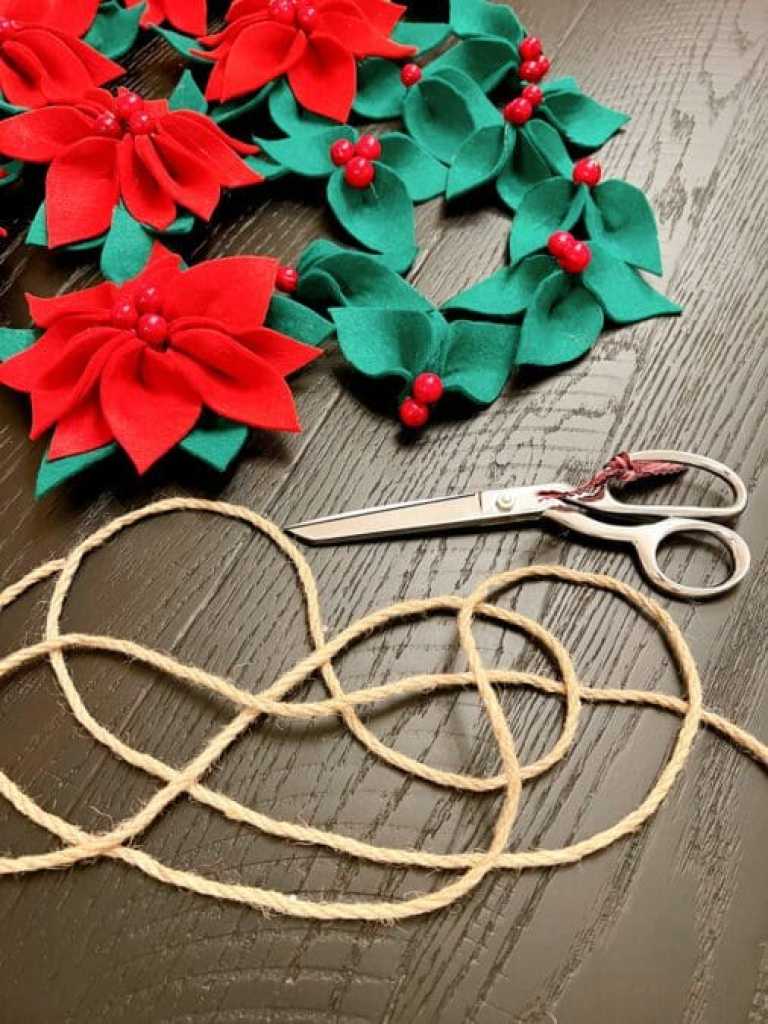
For the last step, I used some heavy twine from a previous project. You can use any type of ribbon or twine, so long as it’s thick enough to glue the poinsettias and holly leaves to. I gathered all six of my poinsettias along with the holly sprigs and laid them out along a 6’ length of twine. Once I was satisfied with their placement and spacing I glued them down. I used some baking parchment paper underneath as I was gluing and it worked well. The glue didn’t stick to the paper when it cooled and thankfully I didn’t glue the garland to my dining table.


Step 7: Enjoy!
I was really pleased with how this garland turned out! Plus it was so inexpensive to make! Cutting out 120 leaves was a little time-consuming, but I binge-watched Homeworthy Christmas shows to pass the time. Have you checked out Homeworthy? If you love home decor like I do their videos are worth watching.


Pin It!

Interesting Facts About Poinsettias
Nerd alert – I’m always interested in the background of whatever I’m teaching; in this case, I was interested in learning a little about poinsettia plants. Poinsettias (Euphorbia pulcherrima) are popular plants often associated with the holiday season. Here are some interesting facts about them:
Origin
- Native Habitat: Poinsettias are native to southern Mexico and Central America, where they grow as perennial shrubs that can reach heights of 10–15 feet in the wild. Fun fact: At our last place in San Diego our neighbors planted their store-bought poinsettia in the ground after the holidays and now two years later it’s the size of a large shrub! It was just beginning to show color as we were moving out. (More about our move in a future post!)
- Cultural Significance: They were used by the Aztecs for dyeing fabrics and making medicinal teas.

Name and History
- Named After Joel Roberts Poinsett: The U.S. ambassador to Mexico in the 1820s brought the plant to the United States, and it was later named in his honor.
- December 12th is National Poinsettia Day: This day commemorates Poinsett’s death and celebrates the plant’s holiday significance.

Characteristics
- Variety of Colors: While red is the most common, poinsettias come in pink, white, orange, and variegated shades.
- Colorful Bracts, Not Flowers: The brightly colored “petals” are actually bracts, or modified leaves. The true flowers are the small yellow buds in the center.

Growing and Care
- Short-Day Plant: Poinsettias require long nights (around 12 hours of darkness) to initiate blooming.
- Temperature Sensitivity: They prefer warm environments (60–70°F) and do not tolerate frost.
- Low Maintenance: They need moderate watering and should not sit in standing water.

Myths and Misconceptions
- Not Lethal to Pets: While poinsettias can cause mild irritation if ingested by pets, they are not highly toxic. The plant’s reputation for being deadly is an exaggeration.
- Symbol of Purity and Celebration: In Mexican culture, they are associated with the Christmas story and purity.
Fun Fact
- Top-Selling Potted Plant: Poinsettias are one of the most popular potted plants in the U.S., with millions sold each holiday season.
Thanks for stopping by! I hope you were inspired to make your own garland! For more crafty ideas be sure to sign up for emails below! Have a great day!
Featured on~ Eclectic Red Barn (TFT Dec 2024)

Discover more from From the Bay to the Beach
Subscribe to get the latest posts sent to your email.


2 Responses
I love your poinsettia garland. so pretty. Congratulations, you are being featured on TFT. I hope you stop by. https://eclecticredbarn.blogspot.com/2024/12/last-minute-decor-ideas-on-tft.html
Have a Merry Christmas,
Bev
Hi Beverly!
Thanks so much! Merry Christmas to you too!