I’ve been wanting to try something new with my holiday decorating this year, and this nautical bell wreath turned out even better than I hoped!
Last January I purchased four holiday decorative bells on clearance at Michael’s. I wasn’t sure what I was going to make with them at the time, but I when recently spotted some rope wreaths on Pinterest, I decided that I wanted to try making my own. The bells and their greenery became simple and beautiful accents on this easy nautical holiday wreath.

- More Christmas in July Crafting Fun!
- Supplies Needed
- Nautical Bell Rope Wreath Supplies
- Step 1: Glue Rope to Ring
- Step 2: Attach the Bells
- Step 3: Attach Greenery
- Step 4: Attach a Hanging Loop
- Pin It!
- Featured on…
- More summer Christmas crafts
- Subscribe today and never miss a post!
- You may also enjoy…
More Christmas in July Crafting Fun!
This beautiful wreath brings together coastal charm and Christmas cheer, creating a unique decoration that welcomes guests with simple seaside elegance. Whether you live by the ocean or just love nautical style, this DIY project will add a special touch to your holiday decor.
Supplies Needed

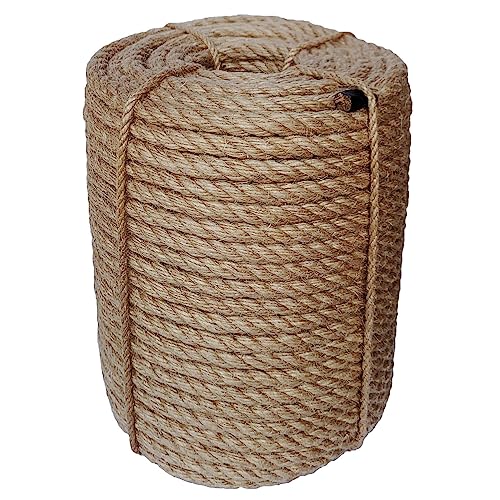
Decorative bells (similar shown) // 16” foam craft ring //Natural jute rope //Glue gun (I love this cordless one!) // Holiday greenery //Thick twine //Scissors
Nautical Bell Rope Wreath Supplies

Unique Cowbell Ornaments for Christmas Tree – Indoor Bell Decorations
Buy Now →
Homeford Craft Foam Wreath, 12-inch, White
Buy Now → Buy Now →
  Buy Now →
  Buy Now →
  Buy Now →
 Step 1: Glue Rope to Ring
To begin, unwind a good amount of rope from the spool (the length will depend on diameter and thickness of your ring) and cut it. Then gather the rope loosely in a bunch because you will need to be able to pass it through the center of the ring as you wrap. Carefully glue the rope onto the ring, pressing the layers tightly together as you go.
The layers will naturally slant at an angle in order to fully cover the ring.


Once the ring is about halfway covered, cut the rope and glue the end down. Then switch over to where you started and begin gluing the rope on that side. Eventually, the two sides will meet in a “v” shape. Stop wrapping at this point and trim the rope.

Cut another length of rope, approximately 3-4 feet depending on the thickness of the ring. Glue on end of the rope in the middle of the “v” and wrap it straight around to the other side. Then wrap it at an angle on one side of the “v” until the ring is covered and cross it diagonally toward the center. Repeat on the other side of the “v” bringing the tail of the rope across the wrapping as shown. Glue the end down securely.

Step 2: Attach the Bells
For this step I carefully removed the greenery that the bells came with so that they were unadorned. I also removed the ropes from their tops.


I then tied them together with a short length of twine.

I attached them to the wreath with another short length of twine on the side opposite from the finishing wrap.

Step 3: Attach Greenery
Using a length of twine (and some hot glue if needed) attach the greenery at the spot on the top of the wreath where the bells are attached.

Step 4: Attach a Hanging Loop
Using a short length of the twine, make a small hanging loop by threading it through the twine at the top and tying a knot.

Pin It!

This article includes affiliate links; if you click on a shopping link and make a purchase I may receive a commission. As an Amazon Associate, I earn from qualifying purchases.
Featured on…


More summer Christmas crafts
Here are even more fun ways to celebrate Christmas in July! Click on the images below!


Subscribe today and never miss a post!
Sharing @betweennapsontheporch.net
Discover more from From the Bay to the Beach
Subscribe to get the latest posts sent to your email.


4 Responses
I love the blend of simplicity and elegance you created with this wreath. This post will be a feature this week. #HomeMattersParty
Thanks Donna! Looking forward to stopping by!
What a charming project Susan!
Thank you for sharing your beautiful bell wreath DIY at Create, Bake, Grow & Gather this week. I’m delighted to be featuring it at today’s party and pinning too.
Thanks Kerryanne!