
In this post I’m sharing step-by-step instructions for creating the perfect spooky starfish wreath to add a touch of “haunted” to your coastal theme this Halloween season.
Coastal decor and Halloween decorations don’t need to be mutually exclusive. There are so many fun themes you can work with to create creepy coastal decor, from pirates and mermaids, to scary sea creatures. Let’s get started!
Table of Contents
- Introduction
- Supplies Needed:
- How to Make the Spooky Starfish
- Step 1: Spray Paint the Starfish
- Step 2: How to Make the Bow
- Step 3: Paint the Ghost Faces/Glue on Googly Eyes
- Step 4: Attach Starfish Ghosts to Wreath
- Step 5: Attach the Bow
- Step 6: Hang and Enjoy!
- Pin It!
- Subscribe to From the Bay to the Beach today!

Introduction
For this simple Halloween project you will first need to source a wreath, preferably black. Your wreath can be made from any material you like, but keep in mind where you intend to hang it and if it can withstand the outside elements. I used a black faux grapevine wreath from Michaels that will work both inside and outside. (You can also use black spray paint to paint another kind of wreath black.) To make the spooky starfishes, I’m using a set of natural starfish, a glue gun, a small paint brush, black acrylic paint, googly eyes and glow-in-the-dark white spray paint. To finish off this project, I’m using 2 kinds of glow-in-the-dark ribbons to make a bow, plus floral wire for hanging.

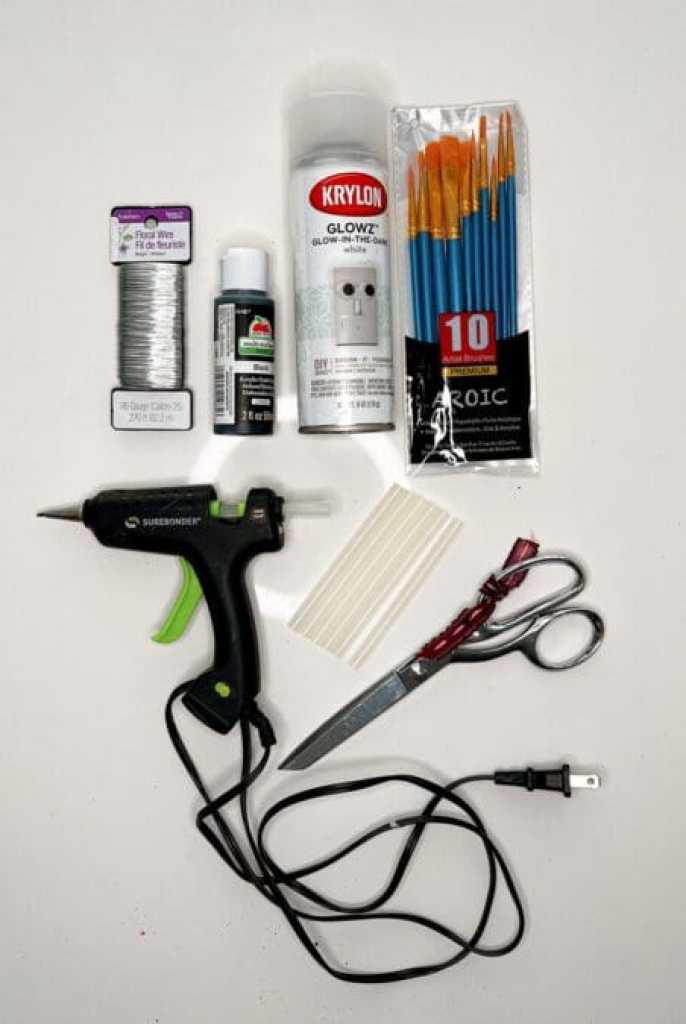
Supplies Needed:
This article includes affiliate links; if you click on a shopping link and make a purchase I may receive a commission. As an Amazon Associate, I earn from qualifying purchases.
1 black wreath 18” or larger
1 dozen 2.5”- 6” starfish (can be real or faux – I used real for this project)
white glow-in-the-dark spray paint
2 kinds of glow-in-the-dark ribbon
How to Make the Spooky Starfish
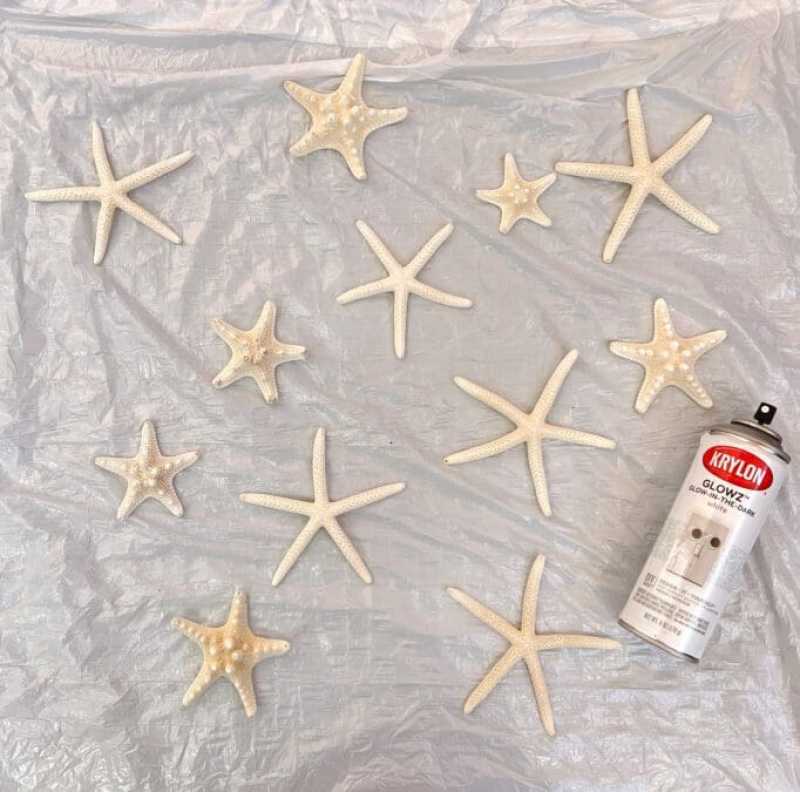
Step 1: Spray Paint the Starfish
In a well-ventilated outdoor area, lay your starfish facing up on a paint cloth. Generously spray with white glow-in-the-dark spray paint, making sure to cover all the nooks and crannies. The paint will go on clear. Allow to dry completely, then add a second coat and wait until dry.
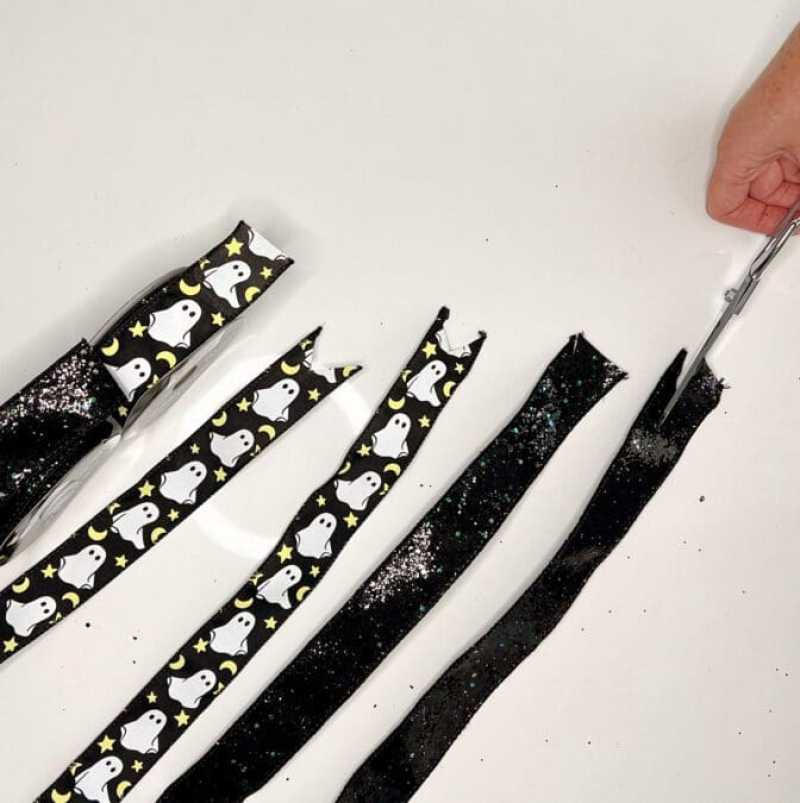
Step 2: How to Make the Bow
While you’re waiting for your starfish to dry, you can make the bow. I learned this quick and easy bow technique from my friend MaryJo at Masterpieces of My Life. Be sure to stop by her blog for lots of crafting inspiration!
To start, cut an approximately 18” length of the first ribbon and dovetail the ends by snipping a “v” shape from the end of the ribbon. This will be the “tail” ribbon”. Next cut another length of the same color ribbon approximately 24” length and dovetail the ends. This will be the “double loop” ribbon.


Repeat these steps with the other ribbons you are using. You should have a “tail” and a “double loop” length for each color.
To make the bow you will be stacking the ribbons by width, starting with the widest ribbons first.
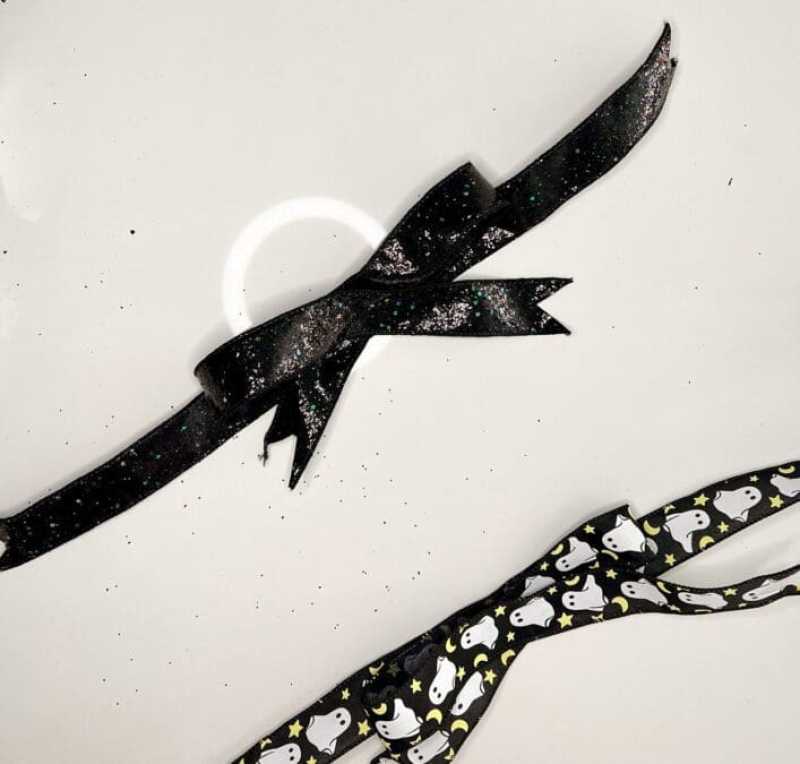

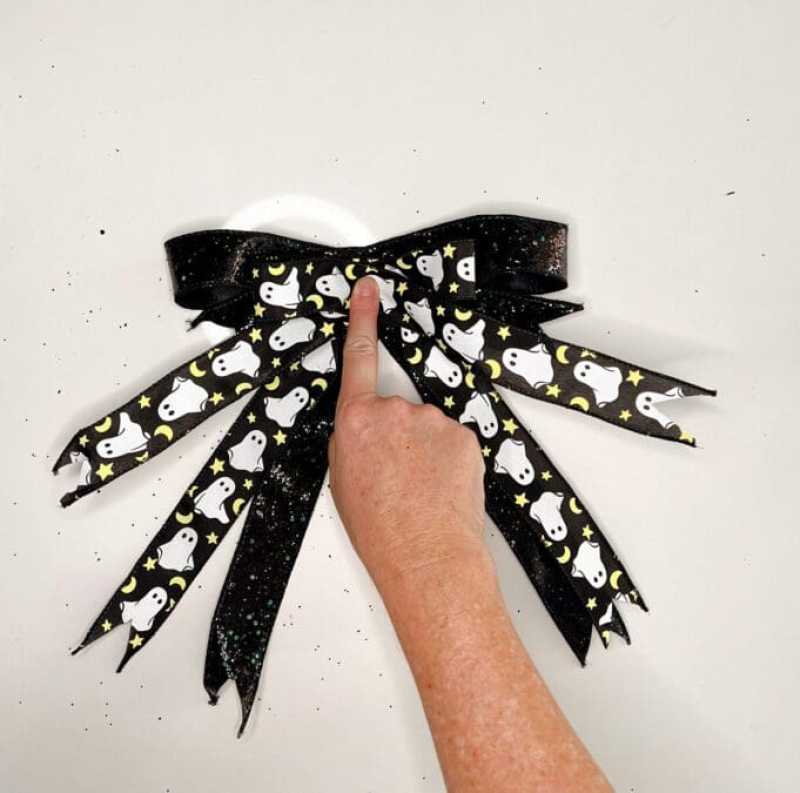
To assemble, start stacking the centers of the ribbons between your thumb and index finger, beginning with the first “tail” ribbon. Next, pinch the matching “double loop” ribbon on top of your first ribbon and bring the loops around and pinch again. Then layer the next “tail” ribbon on it and pinch, followed by the next “double loop” ribbon, bringing the loops around and pinching that one as well. Repeat until all ribbons are stacked in the bow. I used two kinds of ribbons in this bow but you can add more.


Wrap an 8″” piece of floral wire around the center of the bow and twist it in back like a twist tie, making sure all ribbons are secured. You will use the rest of the wire to attach it to the wreath. Fluff and trim as desired.
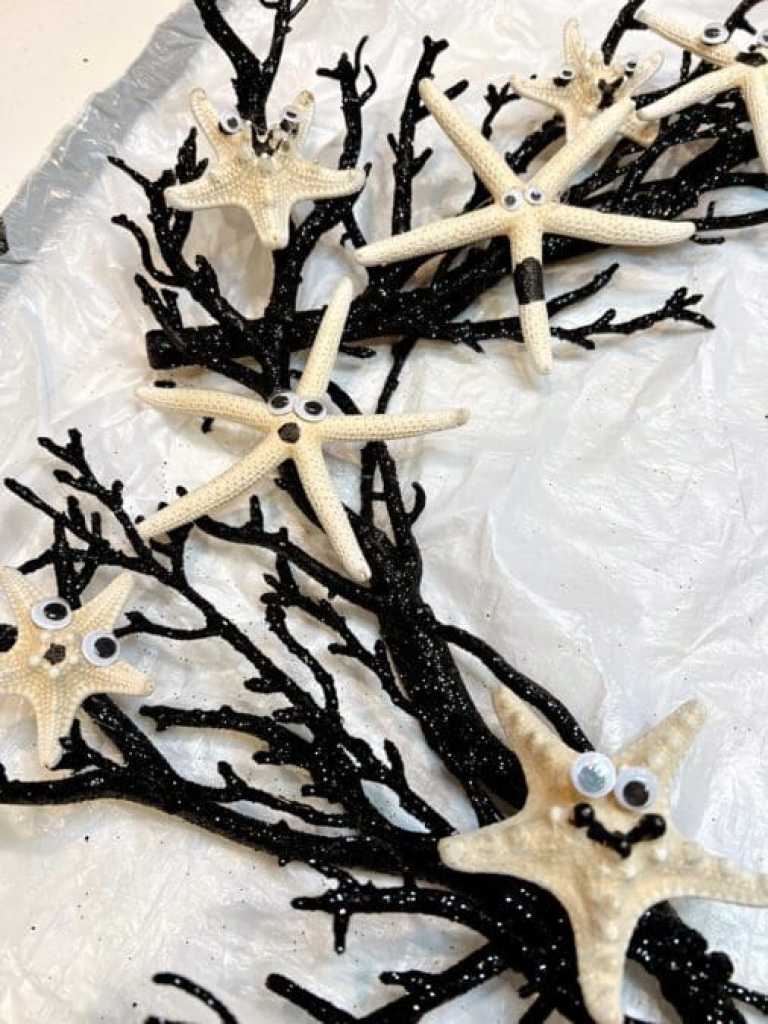
Step 3: Paint the Ghost Faces/Glue on Googly Eyes
Using the black acrylic paint and a small paint brush, paint little faces on the starfish. You can make them as friendly or as scary as you like. Be sure to make the features dark enough to stand out against the glow-in-the-dark paint. Allow to dry completely. I decided that they needed googly eyes so I used hot glue to attach them. Note: You can also skip the paint and just put on the eyes. Either way looks cute.


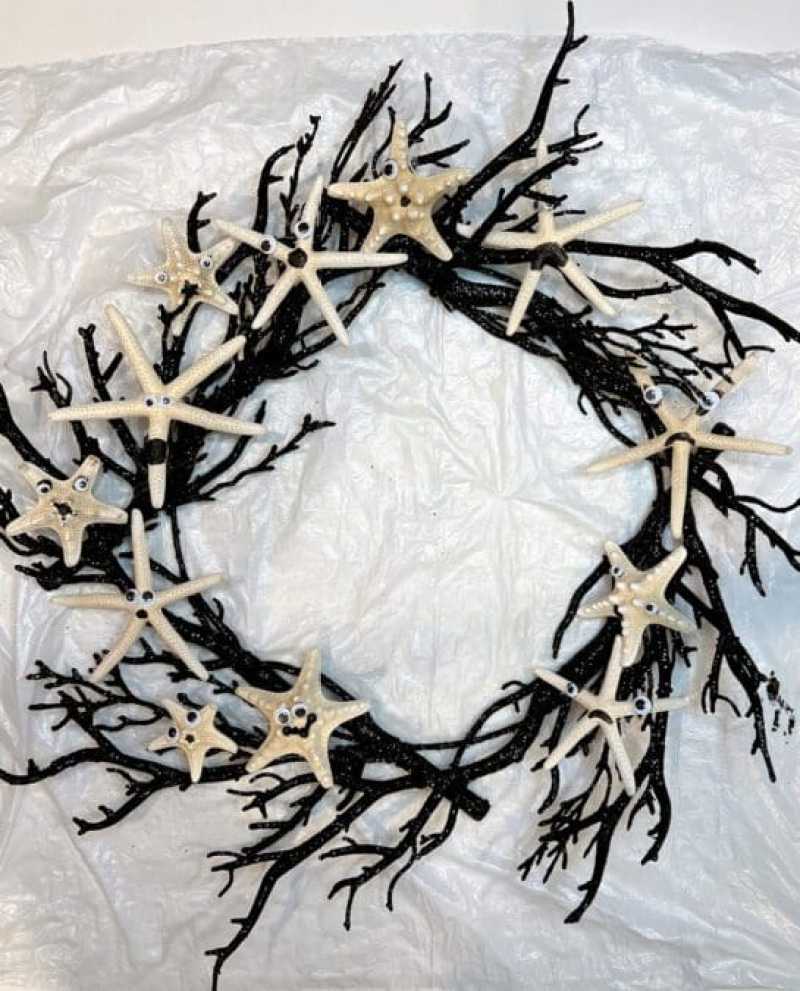
Step 4: Attach Starfish Ghosts to Wreath
Depending on the kind of wreath you are using, you can use hot glue or floral wire to attach your starfishes to your wreath. I used a hot glue gun to attach mine.

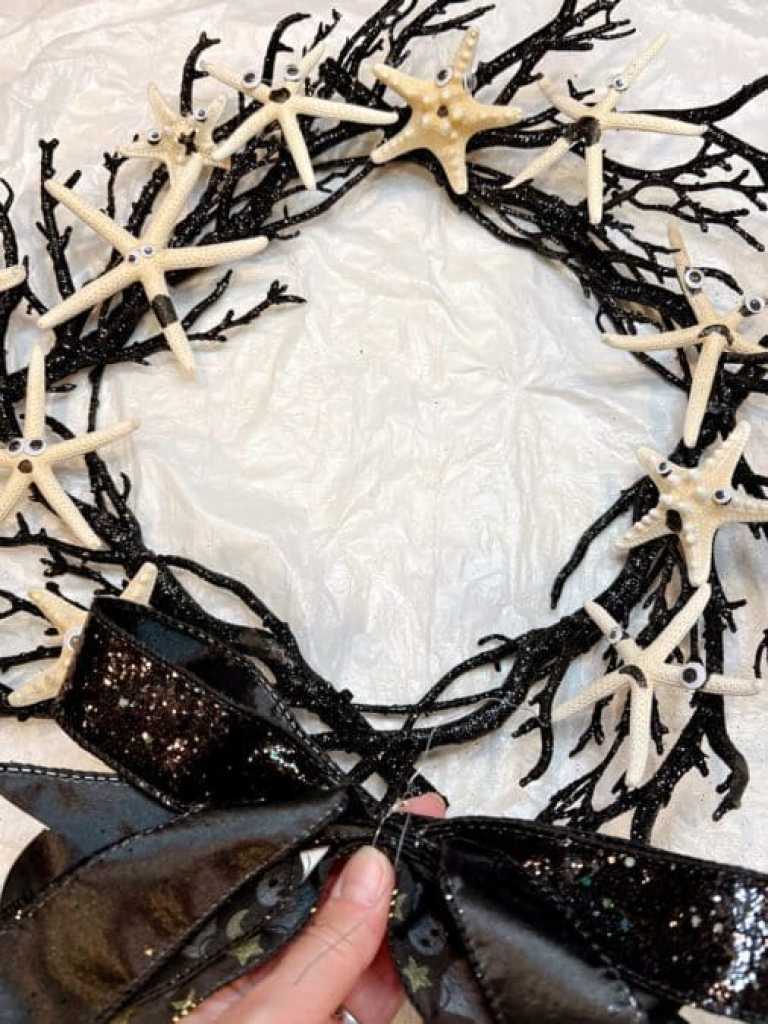
Step 5: Attach the Bow
You can attach your bow at either the top or bottom of your wreath. I attached mine at the bottom but I think either looks great so long as your bow isn’t obscuring your little ghosts!
Step 6: Hang and Enjoy!
If needed, use the floral wire to make a loop for hanging and attach to the back of your wreath at the top. My wreath came with a loop for hanging.
Since so much of this project uses glow-in-the-dark paint, try to hang your wreath in a spot that gets a fair amount of direct light to activate the paint so that it glows when it gets dark. I’d love to hear how your wreath turned out in the comments below! Boo!

I hope you enjoy your new coastal Halloween decor! If you missed my post on how to make a beautiful fall door hanger you can find it here. I’m looking forward to sharing more spooky coastal Halloween projects with you soon. Have a great week!
Pin It!


Subscribe to From the Bay to the Beach today!
Discover more from From the Bay to the Beach
Subscribe to get the latest posts sent to your email.

