
In this post – how to make a beautiful mermaid Christmas tree decoration using decoupaged oyster shells and readily available craft supplies.
Styled 2 Ways
It’s the most wonderful time of the year – July! Welcome to Christmas in July on Styled 2 Ways! MaryJo of Master”pieces” of my Life and I are once again sharing some inspiration from two points of view. Today we’re excited to share two Christmas crafts you can make ahead to enjoy later during the holidays. Double the inspiration and double the fun! Be sure to check out her Christmas craft here!


How to Make a Mermaid Christmas Tree
This month I’m keeping it coastal, so I created a Mermaid Christmas Tree for a fun sea-inspired twist on a traditional tree. Made from decoupaged oyster shells, sea stars and pearls, it’s a pretty way to add a coastal touch to your holiday decor. All it takes is some patience (along with some optional Netflix binge-watching while you decoupage and glue!)

Supplies Needed

For this project, you’ll need:
Approx 25-30 clean and dry medium and large-sized oyster shells (flatter shells are best) decoupaged ahead of time using these instructions
Printed paper cocktail napkins (separated to one-ply – similar item linked)
Optional decorations:

Getting Started – Decorate the Oyster Shells
The first step of this project involves decoupaging the oyster shells, outlining them with gold paint, and allowing them to dry. To get the full tutorial on how I did this, read my post Create Stunning Decoupage Oyster Shell Napkin Rings.
Once you have enough shells completed to cover the foam cone you’re in business. I did this project over the course of two days. On the first day I decorated the shells and on the second day I assembled the tree.
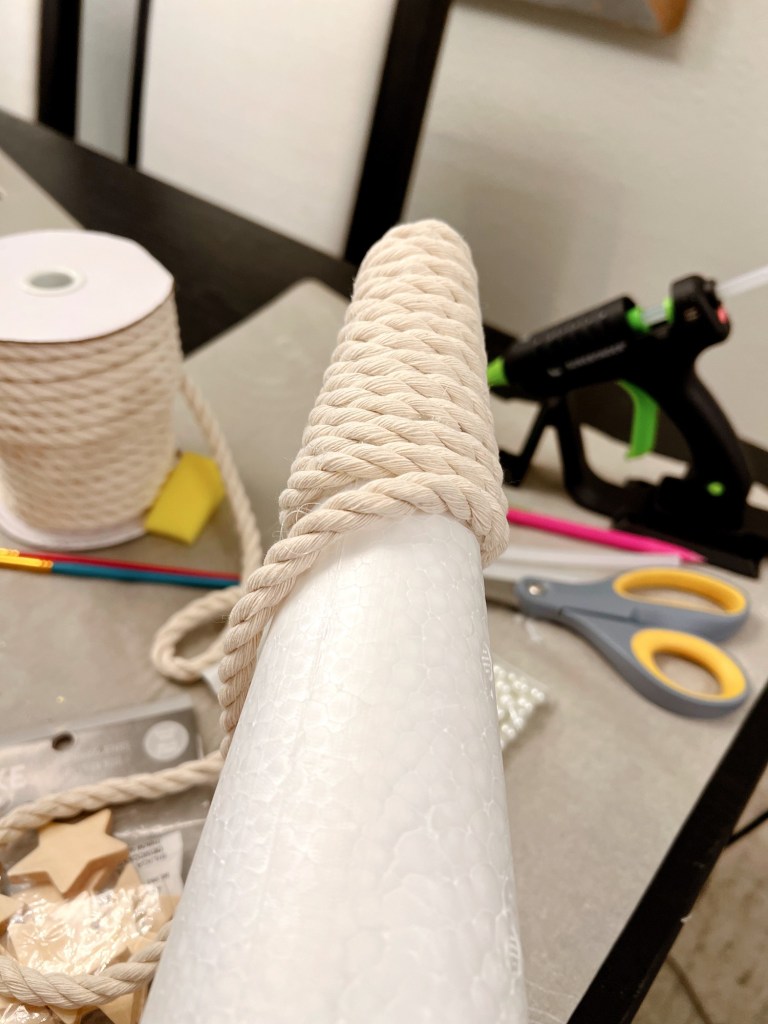
Wrap the Base of the Tree
Because oyster shells are uneven, I knew there was a good chance that the foam cone would show in some spots. To remedy this, I wrapped the entire cone in cotton cording, starting at the tip and winding toward the base. I used hot glue to adhere it.


Layer the Shells
This may seem counterintuitive, but for this project it’s best to start at the top of the cone when attaching the shells. Glue them on one layer at a time, turning the tree as you go. I used smaller shells at the top and larger shells for the lower part. I glued all of the shells with the hinge ends pointing up. As you move down the tree, tuck the hinge end of each shell up under and between the shells above. Don’t worry if some of the cotton cording shows, you can fill that in later if you want (or not.)

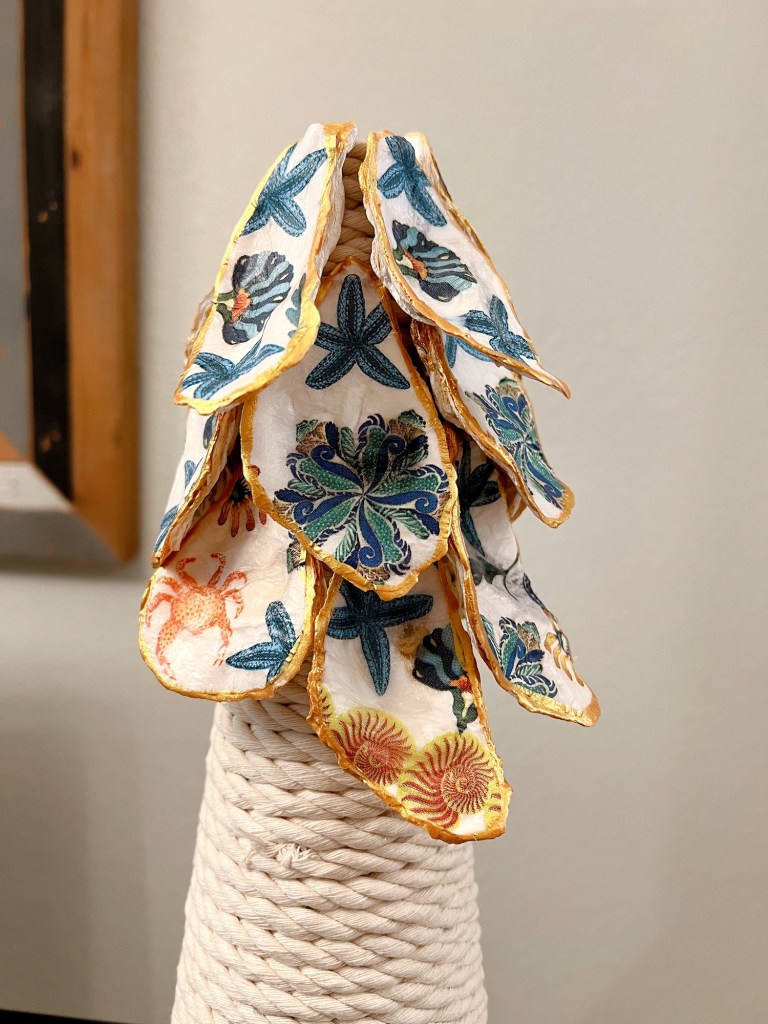

In the photo below you can see the top of the tree and how the shells are attached.
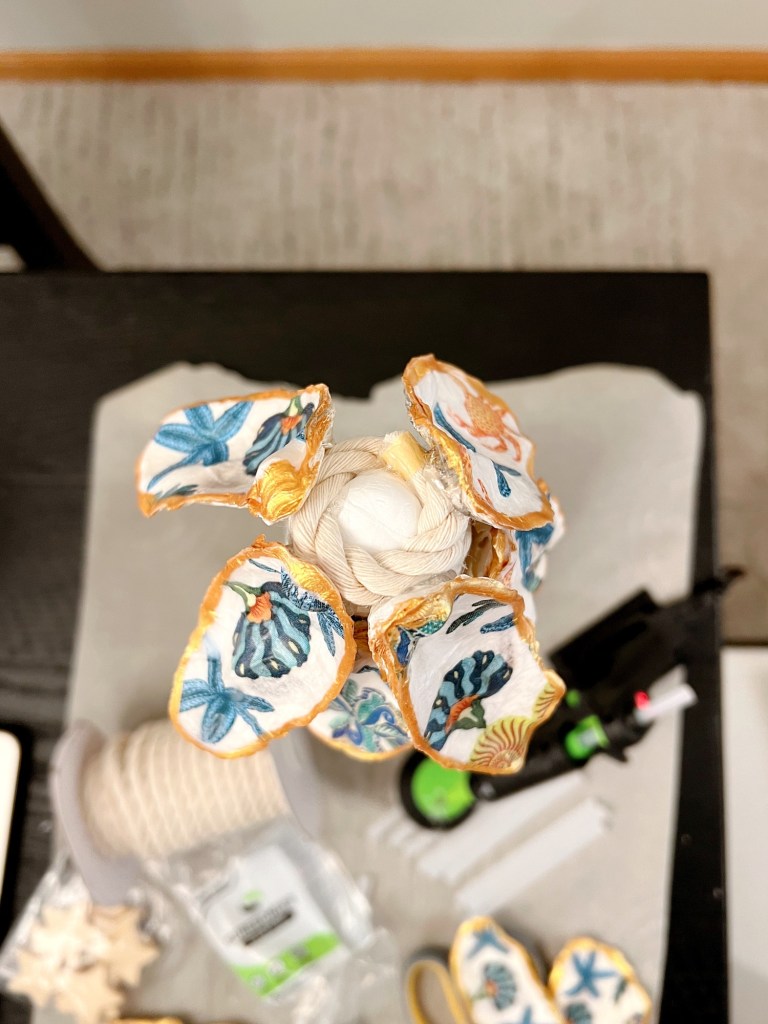
Here you can see the completed tree without any decorations. I inserted one of the arms of this small sea star into the top of the foam cone. I poked a hole in it first with a pen so that I wouldn’t break the sea star’s arm.

If you like this look – which I do! – you can stop at this point. However, I wanted to add a few extra decorations to my tree so I continued on with the next steps.
Decorating the Tree
Add Pearls
If you choose to decorate your mermaid tree, I suggest using faux pearls and small sea stars. The pearls and oysters go together nicely, and the sea stars add some fun coastal touches to the tree.
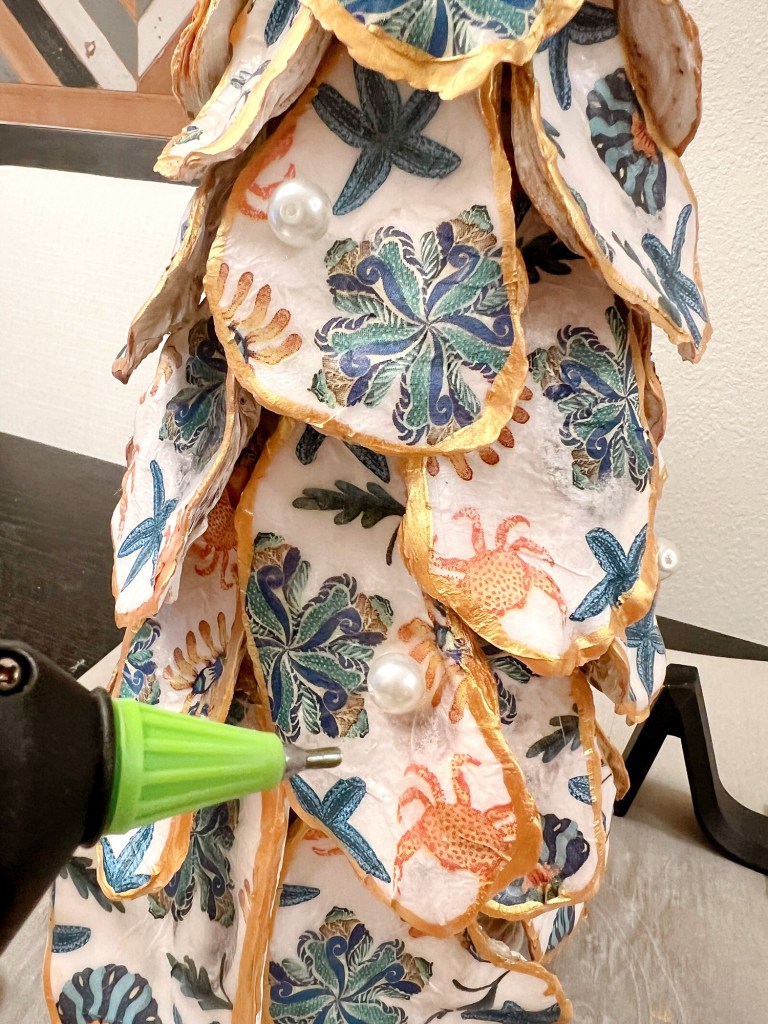
I first glued pearls in between some of the shells at the top where the cotton cord was exposed, as shown in the photo below.

Next, I glued larger pearls in the center of some of the oyster shells. I then outlined the lower halves of some of the shells with smaller pearls, to imitate a garland. (You could simplify this step and use a pearl garland if you want.) All are attached with hot glue. Be careful here, the pearls are tricky to place without burning your fingertips. Tip: I found that it was helpful to have the tree sitting on a turntable so that I could easily spin it around while I worked.

Add Sea Stars
To make the sea stars stand out, I glued them to slightly larger wooden stars that I painted gold using the same paint I used on the oysters.


Once they were dry I glued them to the tree. I also added some larger sea stars to the tree on their own.
Enjoy!
I’m looking forward to displaying this Mermaid Christmas Tree during the holidays. It will make a striking centerpiece on our dining table. Do you use coastal-style decorations during the holidays? I’d love to hear your ideas in the comments below.


Be sure to check out MaryJo’s Christmas in July craft on her blog Master”pieces” of my Life. You can also follow her on Pinterest, Facebook and Instagram!
Pin It!

Be sure to join us on the 2nd Monday of every month for Styled 2 Ways! Subscribe below so you never miss a post!
This article includes affiliate links; if you click on a shopping link and make a purchase I may receive a commission. As an Amazon Associate, I earn from qualifying purchases at no additional cost to you.
sharing@betweennapsontheporch
Discover more from From the Bay to the Beach
Subscribe to get the latest posts sent to your email.

4 Responses
Love it Susan. Coastal Christmas is magical. I love the pearl and starfish details. So pretty. It’s always fun to share together. XO- MJ
Thanks friend! Another fun collab!
The mermaid oyster shell tree is amazing: so gorgeous!
http://www.chezmireillefashiontravelmom.com
Thank you so much Mireille!