In this post – how to make a gift opening kit stocked with all of the essential tools to help make opening presents a breeze.
There’s nothing quite like the excitement of Christmas morning—the laughter, the wrapping paper flying, and the scent of fresh coffee (or mimosas!) in the air. But as anyone who’s been caught without scissors or batteries knows, being prepared can make the difference between holiday magic and mild chaos.

Before the first gift gets passed around, set up a gift opening kit stocked with all the essentials. Here’s what to have ready so the morning flows smoothly—and stays picture-perfect.
Prepare Ahead
Start with a container you love
You don’t need anything fancy — a cookie tin or holiday tin works perfectly to keep everything contained and looks charming sitting under the tree.

Square Tin Containers with Lids, 3 Pack Christmas Cookie Tins
Buy Now →Another option is to use a gift box, like one of these similar to the ones I bought at HomeGoods. They’re perfectly disguised as wrapped presents, so they can hide in plain sight until you need them. You could also wrap a shoebox in pretty paper.

If you prefer something more decorative, try a small woven basket, a lidded decorative bin, or even a fancy gift bag. Add a festive label or tag that reads “Santa’s Helpers” in playful script — you can print one or hand-letter it for a personal touch. This pretty lidded box would also be perfect.
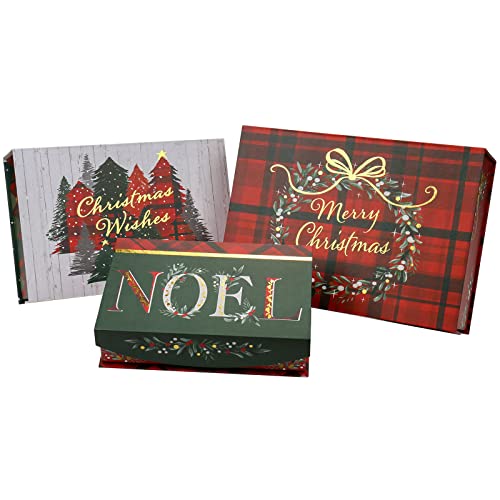
Christmas Gift Boxes with Lids for Presents Pack of 3
Buy Now →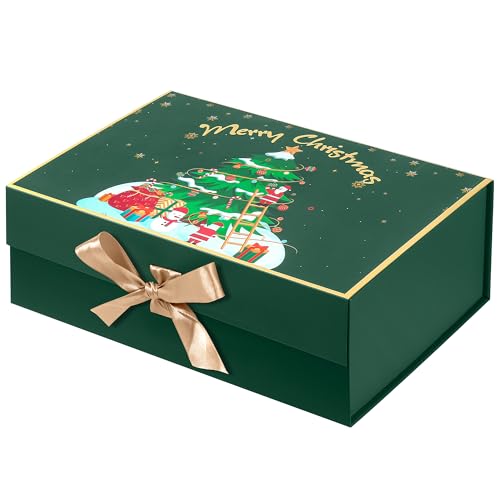
Christmas Gift Box with Lid Gift Boxes for Presents with Ribbon and Magnetic Closure
Buy Now →What to Include in Your Kit

Scissors
Keep a pair of scissors handy for snipping stubborn ribbons, tags, and plastic packaging — because on Christmas morning, it seems like everything is wrapped, taped, or twist-tied. Tip: Having more than one pair means you won’t have to pause the fun while everyone waits their turn.
Consider keeping one sharp, adult pair for heavier-duty tasks like cutting ribbon spools or trimming box edges, and a smaller, kid-friendly pair if you have little helpers eager to join in. Child-safe scissors let kids help open their own presents (or trim wrapping paper for last-minute gifts) without any worry.
If you’re feeling extra organized, you can even color-code them — red handles for adults, green for kids — and store them together in your “Santa’s Helper’s” kit.
Bonus tip: Wrap a bit of festive ribbon around the handles so they’re easy to spot in the flurry of wrapping paper, and so they look cute sitting out near your gift-opening area.
 Buy Now →
Scotch Kids Pointed Tip Scissors with Soft Touch
Buy Now →Box Cutter or Utility Knife
A box cutter is a life-saver for opening taped boxes or toy packaging — because let’s face it, some gifts come sealed tighter than Fort Knox. A good utility knife or box cutter is your secret weapon for slicing through stubborn packing tape, thick cardboard, or those layered Amazon boxes that seem to multiply under the tree.
These are also incredibly handy for cutting through those pesky zip ties that secure toys, electronics, or accessories inside their packaging. Manufacturers really go overboard with those! Having a small, sharp blade nearby saves time (and frustration) when kids are bouncing with excitement, eager to free their new toys.
Just be careful around little fingers — designate one adult as the “Official Unboxer” to handle anything that requires a sharp edge. If you’re worried about safety, look for a retractable box cutter or one with a locking blade, so it can be tucked away safely between uses.

Slice Auto-Retractable Box Cutter
Buy Now →
Premium Utility Knife Set | Retractable Box Cutter with Rubber Handle
Buy Now →Weird But Handy
This might seem like an odd suggestion, but a cuticle trimmer like the one below is great for cutting through stickers and tape. Its small size allows it to squeeze into the smallest of crevices.

Cuticle Knife Trimmer Remover Cutter
Buy Now →Small Screwdriver Set
Many toys and electronics require screwdrivers to access battery compartments—especially Phillips head. It’s one of those little details that can make or break the flow of Christmas morning. There’s nothing worse than watching a child’s excitement fade as you realize their brand-new toy needs batteries and the tiniest screwdriver in the house.
Save yourself the scramble by keeping a mini precision screwdriver set in your “Gift Opening Kit.” These are inexpensive and can often be found at the Dollar Store, Target, or on Amazon. Look for one with interchangeable heads—Phillips, flathead, and even mini Torx bits—so you’re covered no matter what packaging or battery cover you encounter.
They’re also handy for assembling small gadgets, tightening eyeglass screws, or adjusting battery compartments on remotes, kitchen gadgets, and light-up decorations. You might even find yourself reaching for it throughout the day as new gifts get tested and set up.

Mini Precision Screwdriver Set, Small Tools with 11 Size Flathead and Phillips Kit
Buy Now →Batteries in Multiple Sizes
It’s a Christmas classic: the toy that can’t be played with yet. The excitement builds, the wrapping paper flies — and then someone says, “Wait… does this need batteries?” Cue the collective groan.

Avoid that post-present letdown by stocking up on batteries ahead of time. Keep a small stash of AA, AAA, C, and D batteries tucked neatly into your gift opening kit. You’ll thank yourself when the remote-control car, light-up dollhouse, or other fun new gadget can spring to life immediately.
It’s also smart to have a few 9-volts on hand — they’re often forgotten but sometimes needed for smoke detectors, walkie-talkies, or handheld gadgets. Store each battery type in a labeled zip bag or small divider case to keep them organized and prevent them from rolling around in your kit.
 Buy Now →
 If you want to go the extra mile, include a tiny battery tester — they’re inexpensive and make it easy to check which batteries are still good from last year’s stash.

Battery Tester, Universal Battery Checker Small Battery Testers for AAA AA C D 9V 1.5V Button Cell
Buy Now →Bonus tip: Keep a pack of rechargeable batteries and a small charger ready to go. It’s eco-friendly, saves money, and ensures you’re never caught empty-handed when the fun begins.
 Buy Now →
 Extra Charging Cables
Have phone chargers or USB-C cords ready for new gadgets, earbuds, or smart devices. It’s amazing how many gifts these days need a quick charge right out of the box — from wireless headphones and tablets to fitness watches and smart home accessories. Having a few cords and adapters at the ready keeps the excitement going instead of hitting pause while everyone searches for the right plug.
Make it easy on yourself by setting up a charging station near the gift-opening area. A small power strip or USB hub on an end table or console lets multiple devices charge at once — no more fighting over outlets or moving furniture to find a plug behind the couch.

Anker Power Strip Surge Protector with 12 Outlets with 2 USB A and 1 USB C Port for Multiple Devices
Buy Now →If you’re hosting family, keep a mix of cords available: lightning cables for Apple users, USB-C for newer devices, and maybe a few micro-USBs for older gadgets. Store them neatly in a labeled zip pouch or small woven basket in your “Santa’s Helper Station.” You can even wrap each cord with a little piece of twine or a reusable cable tie so they don’t tangle.
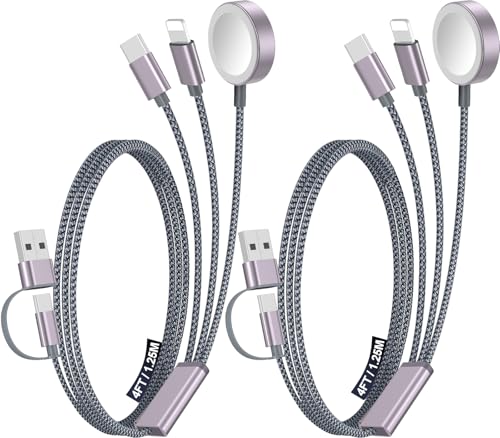
2Pack Multi Charging Cable Cord
Buy Now →Bonus tip: Keep a portable power bank or two in your kit as well — perfect if someone’s phone dies mid-photo session or if new electronics need a quick boost before their first use. It’s a small touch that keeps the morning running smoothly and helps ensure you capture every smile, laugh, and unwrapping moment without a low-battery interruption.

Portable Charger Power Bank 50000mAh Battery Pack 22.5W Fast Charging PowerBank with Built in Cables
Buy Now →How to Manage the Mess as You Go
Small Box or Bin for Reusable Items
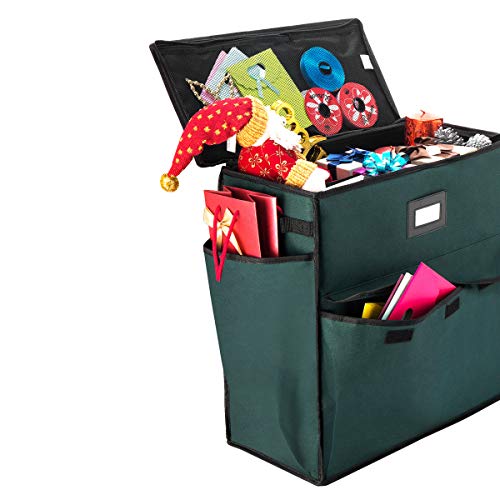
Save pretty ribbons, gift bags, and tissue paper that can live to see another Christmas in a dedicated gift supply storage box. After all, some of that wrapping is simply too lovely to toss — the satin bows, tissue paper, gift bags, and those tiny gift tags that still have plenty of life left in them.
Once the wrapping paper frenzy starts to slow down, set aside a clean area (or even a large basket) where you can collect anything reusable. Then, after the presents are opened, sort through your finds: fold the tissue paper that’s still crisp, roll the ribbons into small loops, and flatten the gift bags. A quick tidy now saves you time and money next holiday season — plus it feels good to reuse rather than waste.
 Buy Now →
 For easy storage, keep everything in a clear plastic bin or festive holiday box labeled “Gift Wrap Reuse”. You can even separate by category — ribbons, tissue, tags, and bags — or keep a smaller version of the box tucked into your closet for birthdays and special occasions throughout the year.

Simplify 5 Compartment Gift Supply Storage Box | 2 Tier Box | Red | Clear Top Lid
Buy Now →Large Trash Bags or Recycling Bags
A little pre-planning goes a long way when the paper starts flying! By sorting as you go, you’ll keep your living room looking festive and cozy instead of chaotic and cluttered.
Choose large, sturdy bags or even decorative bins that blend with your holiday décor. Clearly label each bag: one for trash, one for recyclables, and one for reusable ribbons and bows.
Encourage everyone to help with cleanup while the morning unfolds — kids can be “Santa’s recycling elves,” gathering up paper between gifts. It keeps the energy fun and the space clear so no one accidentally tosses a gift part or accessory in the mess.
Once the last gift is opened, you’ll find the tidy-up almost effortless. The presents can take center stage, the coffee table remains visible, and your Christmas photos will capture happy memories rather than a mountain of paper chaos.

Recycle Bags Reusable w/Extra Sturdy Handles | Made of recycled materials, Set of 2
Buy Now →Handheld Vacuum
Keep one handy to sweep up glitter, pine needles, wrapping scraps, and bits of plastic — all those tiny leftovers that somehow multiply during the gift-opening frenzy. Whether it’s a small handheld vacuum, a mini broom and dustpan, or even a lint roller, having a quick-clean tool nearby makes it easy to tidy up without breaking the festive flow.

BLACK+DECKER dustbuster AdvancedClean Cordless Handheld Vacuum
Buy Now →
Shark Cordless Vacuum Cleaner with HEPA Filter, Lightweight, Portable, Rechargeable
Buy Now →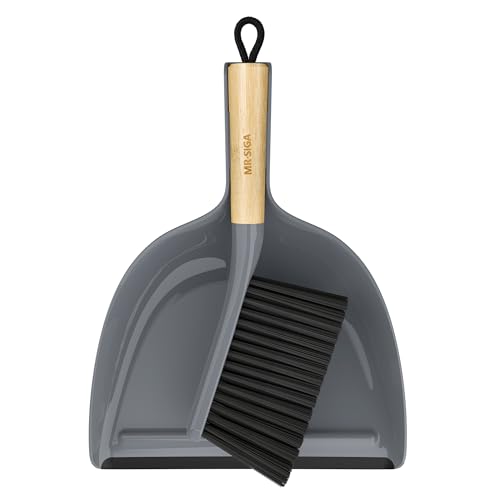
MR.SIGA Dustpan and Brush Set, Portable Cleaning Brush and Dustpan Combo with Bamboo Handle
Buy Now →Replenish for Next Year
Each year, simply refill and refresh your kit by adding more batteries and replacing any missing items and you’ll be set for another season of stress-free gift opening year-round. It’s a small step that makes Christmas morning feel more relaxed, polished, and ready for those perfect candid photos.

With just a bit of preparation, you’ll spend less time searching for scissors and more time soaking in those magical moments—smiles, laughter, and the sparkle of holiday joy. Because Christmas morning should feel as seamless as it looks in your favorite Hallmark movie, or at least slightly less chaotic!
Save for later!

Subscribe
Featured on…

This post includes affiliate links; if you click on a shopping link and make a purchase I may receive a commission. As an Amazon Associate, I earn from qualifying purchases.
Sharing @ https://betweennapsontheporch.net/
Discover more from From the Bay to the Beach
Subscribe to get the latest posts sent to your email.


2 Responses
Genius idea! Your box and supply list have covered everything you could need on Christmas morning. Thanks for sharing the idea and this post will be a feature this week. #HomeMattersParty
Thanks Donna! I’m glad you found it helpful. Looking forward to stopping by!